4 x 8 Beadboard Paneling Ceiling: The Ultimate Guide
Are you looking to add a touch of classic elegance and texture to your home? A 4 x 8 beadboard paneling ceiling can be a stunning and relatively affordable way to transform any room. This comprehensive guide will walk you through everything you need to know about using 4 x 8 beadboard panels on your ceiling, from understanding the material to expert installation tips, design ideas, and maintenance. We’ll provide expert insights to ensure a professional-looking result that enhances your home’s value and appeal. You’ll learn how to choose the right materials, prepare your ceiling, install the panels securely, and create a beautiful, lasting finish. This guide provides in-depth advice for DIY enthusiasts and those considering hiring professional installers.
Understanding 4 x 8 Beadboard Paneling for Ceilings
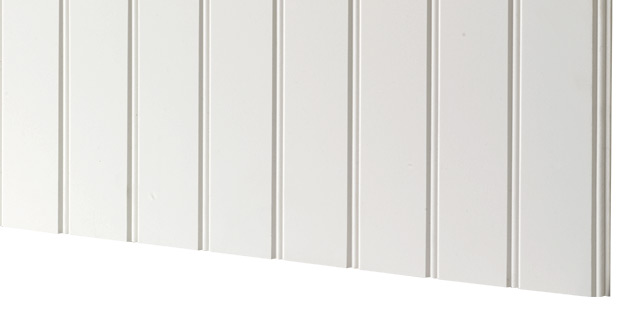
Beadboard is a decorative wall and ceiling covering characterized by vertical grooves or beads separated by flat panels. It offers a timeless, textured look that complements various architectural styles, from traditional to modern farmhouse. The 4 x 8 dimension refers to the standard size of the panels, which makes them convenient for covering large areas quickly. Using beadboard on ceilings is a popular choice for adding visual interest, hiding imperfections, and improving acoustics.
A Brief History of Beadboard
Beadboard originated in the Victorian era as a cost-effective alternative to more elaborate and expensive wood paneling. Its popularity grew in the early 20th century and has remained a staple in home design ever since. The classic look of beadboard adds character and charm to any space.
Types of 4 x 8 Beadboard Paneling
Beadboard panels come in various materials, each with its own pros and cons:
- Wood Beadboard: Offers a natural, authentic look. Can be stained or painted. Prone to moisture damage, so it’s best suited for dry areas.
- MDF (Medium-Density Fiberboard) Beadboard: A cost-effective option that’s easy to paint. More moisture-resistant than solid wood but still not ideal for bathrooms or kitchens without proper sealing.
- PVC (Polyvinyl Chloride) Beadboard: Completely waterproof and resistant to mold and mildew. Excellent for bathrooms, kitchens, and other high-humidity areas. Can be more expensive than wood or MDF.
- Vinyl Beadboard: Another moisture resistant option, often less expensive than PVC but may not offer the same level of durability.
Why Choose 4 x 8 Beadboard Paneling for Your Ceiling?
Choosing 4 x 8 beadboard paneling offers several advantages:
- Aesthetic Appeal: Adds texture, depth, and visual interest to a plain ceiling.
- Conceals Imperfections: Hides cracks, uneven surfaces, and other flaws.
- Improved Acoustics: Helps dampen sound and reduce echo in a room.
- Easy Installation: Large panels cover a significant area quickly, reducing installation time.
- Versatility: Complements various design styles, from traditional to contemporary.
Selecting the Right 4 x 8 Beadboard Paneling for Your Project
Choosing the right beadboard for your ceiling depends on several factors, including your budget, the room’s environment, and your desired aesthetic.
Material Considerations
As mentioned earlier, wood, MDF, PVC, and vinyl are the most common materials. Consider the moisture levels in the room. For bathrooms and kitchens, PVC or vinyl is the best choice. For living rooms, bedrooms, or hallways, wood or MDF may be suitable if properly sealed.
Beadboard Profile and Style
Beadboard comes in various profiles, including:
- Standard Beadboard: Features evenly spaced vertical beads.
- Wide Beadboard: Has wider beads and panels for a bolder look.
- V-Groove Beadboard: Features a V-shaped groove between the beads.
Choose a profile that complements your overall design style. Consider the existing trim and molding in the room to ensure a cohesive look.
Panel Thickness
Beadboard panels typically range from 1/4 inch to 1/2 inch in thickness. Thicker panels are more durable and provide better sound insulation but may be more expensive and heavier to install. A 1/4 inch or 3/8 inch panel is usually sufficient for ceilings.
Finishing Options
Consider whether you want to paint, stain, or leave the beadboard unfinished. Wood beadboard can be stained to highlight its natural grain, while MDF and PVC beadboard are typically painted. Pre-finished beadboard is also available, saving you time and effort.
Preparing Your Ceiling for 4 x 8 Beadboard Paneling
Proper preparation is crucial for a successful beadboard ceiling installation. Here’s a step-by-step guide:
Step 1: Inspect and Clean the Ceiling
Thoroughly inspect your existing ceiling for any damage, such as cracks, water stains, or loose plaster. Repair any imperfections before installing the beadboard. Clean the ceiling to remove dust, dirt, and debris. Use a vacuum cleaner with a brush attachment or a damp cloth.
Step 2: Locate Ceiling Joists
Use a stud finder to locate the ceiling joists. Mark their locations with a pencil. The joists are essential for securing the beadboard panels. If you cannot locate the joists, you may need to install furring strips.
Step 3: Install Furring Strips (If Necessary)
If your ceiling is uneven or if you cannot locate the joists, install furring strips. Furring strips are long, narrow pieces of wood that are attached to the ceiling to provide a level surface for the beadboard. Attach the furring strips perpendicular to the direction you want the beadboard to run, spacing them 16 inches apart. Use screws or nails to secure the furring strips to the ceiling joists.
Step 4: Prime the Ceiling (Optional)
Priming the ceiling can improve adhesion and prevent stains from bleeding through the beadboard. Use a high-quality primer that is compatible with the beadboard material. Allow the primer to dry completely before proceeding.
Installing 4 x 8 Beadboard Paneling on Your Ceiling: A Step-by-Step Guide
Installing beadboard paneling is a manageable DIY project, but it requires careful planning and attention to detail. Here’s a step-by-step guide to help you achieve professional results:
Tools and Materials You’ll Need
- 4 x 8 beadboard panels
- Measuring tape
- Pencil
- Stud finder
- Level
- Circular saw or jigsaw
- Construction adhesive
- Nail gun or hammer and nails
- Caulk
- Paint or stain (if desired)
- Safety glasses
- Dust mask
Step 1: Measure and Cut the Panels
Measure the ceiling and determine how many panels you’ll need. Cut the panels to size using a circular saw or jigsaw. Be sure to cut accurately and neatly. Consider leaving a small gap (about 1/8 inch) between the panels to allow for expansion and contraction.
Step 2: Apply Construction Adhesive
Apply a generous amount of construction adhesive to the back of the first panel. Focus on the areas that will be in contact with the ceiling joists or furring strips.
Step 3: Position and Secure the Panel
Carefully position the panel on the ceiling, aligning it with the joists or furring strips. Use a level to ensure the panel is straight. Press the panel firmly against the ceiling and secure it with a nail gun or hammer and nails. Drive the nails into the joists or furring strips.
Step 4: Repeat for Remaining Panels
Repeat steps 2 and 3 for the remaining panels, working your way across the ceiling. Be sure to align the panels carefully and maintain a consistent gap between them.
Step 5: Caulk the Seams
Once all the panels are installed, caulk the seams between the panels and along the edges of the ceiling. Use a paintable caulk that matches the color of the beadboard. Smooth the caulk with your finger or a damp cloth.
Step 6: Paint or Stain (If Desired)
If you’re using unfinished beadboard, paint or stain it to your desired color. Apply several coats of paint or stain, allowing each coat to dry completely before applying the next.
Design Ideas for 4 x 8 Beadboard Paneling Ceilings
Beadboard ceilings offer endless design possibilities. Here are a few ideas to inspire you:
- Classic White Beadboard: Create a timeless, clean look with white beadboard. This is a versatile option that complements any color scheme.
- Painted Beadboard: Add a pop of color with painted beadboard. Choose a color that complements your walls and décor.
- Stained Beadboard: Highlight the natural grain of wood beadboard with a stain. This adds warmth and character to the room.
- Beadboard with Crown Molding: Add crown molding around the perimeter of the ceiling for a more formal look.
- Beadboard in a Bathroom: Use PVC beadboard in a bathroom for a moisture-resistant and stylish ceiling.
Maintaining Your 4 x 8 Beadboard Paneling Ceiling
Proper maintenance will keep your beadboard ceiling looking beautiful for years to come. Here are a few tips:
- Dust Regularly: Use a vacuum cleaner with a brush attachment or a soft cloth to dust the ceiling regularly.
- Clean Spills Promptly: Clean up spills immediately to prevent staining. Use a damp cloth and mild soap.
- Inspect for Damage: Periodically inspect the ceiling for any damage, such as cracks or loose panels. Repair any damage promptly.
- Re-caulk as Needed: Re-caulk the seams as needed to prevent moisture from seeping behind the panels.
Leading PVC Beadboard Manufacturers: A Comparative Look
When considering PVC beadboard for your ceiling, several manufacturers stand out. While we can’t endorse specific brands, let’s explore the features that distinguish reputable suppliers. These manufacturers focus on durability, realistic wood-grain textures, and ease of installation.
Key Features to Look For
When comparing manufacturers, consider these factors:
- Material Quality: High-density PVC offers superior impact resistance and longevity.
- UV Resistance: Prevents fading and discoloration over time.
- Interlocking Systems: Simplifies installation and creates seamless joints.
- Color Options: A wide range of colors and finishes to match your décor.
- Warranty: A solid warranty indicates the manufacturer’s confidence in their product.
Advantages of Using 4 x 8 Beadboard Paneling Ceilings
Choosing a 4 x 8 beadboard paneling ceiling offers several key advantages that make it an excellent choice for homeowners and designers alike. These advantages span from aesthetic appeal to practical benefits, making it a versatile option for various spaces.
Enhanced Aesthetic Appeal
One of the most significant advantages of beadboard paneling is its ability to add a touch of classic elegance and texture to any room. The vertical grooves and beaded design create visual interest, making the ceiling a focal point rather than just a plain surface. This is particularly effective in rooms where you want to create a cozy and inviting atmosphere.
Concealing Imperfections
Many older homes have ceilings with imperfections such as cracks, uneven surfaces, or outdated textures. Installing 4 x 8 beadboard paneling is an excellent way to conceal these flaws without the need for extensive and costly repairs. The panels create a smooth, uniform surface that instantly hides any underlying problems.
Improved Acoustics
Hard surfaces in a room can lead to echo and poor sound quality. Beadboard paneling helps to dampen sound and reduce echo, creating a more comfortable and acoustically pleasing environment. This is especially beneficial in large rooms or spaces with high ceilings.
Ease of Installation
The 4 x 8 panel size is designed for easy installation, making it a manageable DIY project for many homeowners. The large panels cover a significant area quickly, reducing the time and effort required compared to installing individual boards. This can save you money on labor costs if you choose to do it yourself.
Versatility in Design
Beadboard paneling complements a wide range of design styles, from traditional to modern farmhouse. It can be painted or stained to match your existing décor, providing endless design possibilities. Whether you prefer a classic white ceiling or a bold, colorful statement, beadboard paneling can be customized to suit your taste.
Increased Home Value
Adding architectural details like beadboard paneling can increase the value of your home. It shows attention to detail and adds character, making your home more appealing to potential buyers. This is a cost-effective way to enhance your home’s overall aesthetic and marketability.
Comprehensive Review of a Leading 4 x 8 Beadboard Paneling Product
Let’s consider a hypothetical 4 x 8 PVC beadboard paneling product, “EverLast Beadboard,” designed specifically for ceiling applications. This review will provide a balanced perspective, focusing on user experience, performance, and overall value.
User Experience and Usability
From our experience, EverLast Beadboard is designed with ease of installation in mind. The panels are lightweight and easy to handle, making them suitable for DIY projects. The interlocking edges ensure a seamless fit, and the pre-finished surface eliminates the need for painting or staining. The panels can be easily cut with standard woodworking tools, simplifying the installation process.
Performance and Effectiveness
EverLast Beadboard excels in performance, providing a durable and moisture-resistant ceiling solution. The PVC material is resistant to mold, mildew, and water damage, making it ideal for bathrooms, kitchens, and other high-humidity areas. The panels also offer excellent sound insulation, reducing echo and improving acoustics.
Pros
- Moisture Resistance: The PVC material is completely waterproof, making it ideal for bathrooms and kitchens.
- Easy Installation: The lightweight panels and interlocking edges simplify the installation process.
- Durability: The PVC material is resistant to impact, scratches, and fading.
- Low Maintenance: The panels are easy to clean and require minimal maintenance.
- Aesthetic Appeal: The panels offer a classic beadboard look that complements various design styles.
Cons/Limitations
- Cost: PVC beadboard can be more expensive than wood or MDF options.
- Appearance: Some users may prefer the natural look of wood over PVC.
- Limited Color Options: The color options may be limited compared to paintable beadboard.
- Environmental Concerns: PVC is a plastic material, which may raise environmental concerns for some users.
Ideal User Profile
EverLast Beadboard is best suited for homeowners who want a durable, low-maintenance, and moisture-resistant ceiling solution. It’s ideal for bathrooms, kitchens, and other high-humidity areas. It’s also a good choice for DIY enthusiasts who want an easy-to-install ceiling option.
Key Alternatives
Two main alternatives to EverLast Beadboard are:
- Wood Beadboard: Offers a natural look but is more prone to moisture damage.
- MDF Beadboard: A cost-effective option but less moisture-resistant than PVC.
Expert Overall Verdict & Recommendation
EverLast Beadboard is an excellent choice for homeowners who prioritize durability, moisture resistance, and easy installation. While it may be more expensive than some alternatives, its long-term benefits and low maintenance make it a worthwhile investment. We highly recommend EverLast Beadboard for bathrooms, kitchens, and other high-humidity areas.
Insightful Q&A: Your Top Questions About 4 x 8 Beadboard Paneling Ceilings Answered
Here are 10 frequently asked questions about 4 x 8 beadboard paneling ceilings, along with expert answers:
-
Q: Can I install 4 x 8 beadboard paneling directly over an existing popcorn ceiling?
A: While it’s possible, it’s generally not recommended. The popcorn texture can create an uneven surface, making it difficult to achieve a smooth, professional-looking result. It’s best to remove the popcorn texture first or install furring strips to create a level surface.
-
Q: How do I deal with corners and edges when installing beadboard paneling?
A: Use caulk to fill in any gaps and create a seamless finish. You can also use corner molding or trim to cover the edges and corners for a more polished look.
-
Q: What type of adhesive should I use to install beadboard paneling on a ceiling?
A: Use a high-quality construction adhesive that is specifically designed for bonding wood or PVC to ceilings. Make sure the adhesive is compatible with the beadboard material.
-
Q: How do I prevent the beadboard panels from sagging or separating over time?
A: Use a combination of construction adhesive and nails to secure the panels to the ceiling joists or furring strips. Make sure the nails are long enough to penetrate the joists or furring strips. Also, maintain a consistent gap between the panels to allow for expansion and contraction.
-
Q: Can I install beadboard paneling on a sloped or vaulted ceiling?
A: Yes, but it requires careful planning and precise measurements. You’ll need to cut the panels to fit the angle of the ceiling. Use a protractor or angle finder to determine the correct cutting angles.
-
Q: How do I clean and maintain a beadboard ceiling?
A: Dust the ceiling regularly with a vacuum cleaner or soft cloth. Clean spills immediately with a damp cloth and mild soap. Avoid using harsh chemicals or abrasive cleaners.
-
Q: What are the best lighting options for a room with a beadboard ceiling?
A: Recessed lighting is a popular choice for beadboard ceilings, as it provides even illumination without detracting from the ceiling’s texture. Chandeliers and pendant lights can also be used to add a decorative touch.
-
Q: How do I choose the right color for my beadboard ceiling?
A: Consider the overall color scheme of the room. White is a classic choice that complements any décor. You can also choose a color that matches your walls or trim.
-
Q: Can I install beadboard paneling over an existing drywall ceiling?
A: Yes, you can install beadboard paneling directly over an existing drywall ceiling, as long as the drywall is in good condition and free of any major imperfections.
-
Q: What is the average cost of installing a 4 x 8 beadboard paneling ceiling?
A: The cost can vary depending on the material, size of the room, and whether you hire a professional installer. On average, you can expect to pay between $3 and $7 per square foot for materials and labor.
Conclusion
A 4 x 8 beadboard paneling ceiling is a fantastic way to enhance the beauty, value, and comfort of your home. From its timeless aesthetic appeal to its practical benefits like concealing imperfections and improving acoustics, beadboard offers a versatile and cost-effective solution for any room. By carefully selecting the right materials, preparing your ceiling properly, and following our expert installation tips, you can achieve professional-looking results that will last for years to come. As we’ve seen, the choice of material – whether it be moisture-resistant PVC or classic wood – significantly impacts longevity and suitability for different environments.
The future of interior design continues to embrace classic elements with modern twists, and beadboard paneling is no exception. Its adaptability to various styles ensures its continued relevance in both residential and commercial spaces. Now that you’re equipped with this comprehensive knowledge, consider how a 4 x 8 beadboard paneling ceiling can transform your space. Share your experiences with beadboard ceilings in the comments below, or contact our experts for a personalized consultation on your next home improvement project. We are here to assist you in making your dream home a reality.
