How to Make Acrylic Window Inserts: A Comprehensive Guide
Tired of drafty windows and sky-high energy bills? You’re not alone. Many homeowners are searching for cost-effective ways to improve insulation and reduce their environmental footprint. If you’re looking for a DIY solution that’s both effective and relatively simple, learning **how to make acrylic window inserts** might be the perfect answer. This comprehensive guide will walk you through every step of the process, from measuring your windows to installing the finished product. We’ll cover material selection, tool recommendations, safety precautions, and expert tips to ensure your project is a success. By the end of this article, you’ll have the knowledge and confidence to create custom-fit acrylic window inserts that will significantly improve your home’s energy efficiency and comfort.
## Why Choose Acrylic Window Inserts?
Before we dive into the how-to, let’s discuss why acrylic is an excellent choice for window inserts. Acrylic, also known as Plexiglas, offers several advantages over glass and other plastic alternatives. These benefits include:
* **Superior Insulation:** Acrylic provides better insulation than single-pane glass, helping to reduce heat loss in the winter and heat gain in the summer.
* **Lightweight:** Acrylic is significantly lighter than glass, making it easier to handle and install.
* **Impact Resistance:** Acrylic is much more resistant to impact than glass, reducing the risk of breakage.
* **UV Resistance:** Acrylic is naturally UV resistant, preventing yellowing and degradation over time.
* **Clarity:** Acrylic offers excellent optical clarity, allowing plenty of natural light to enter your home.
* **Ease of Fabrication:** Acrylic is relatively easy to cut, drill, and shape with common tools.
These qualities make acrylic window inserts a durable, energy-efficient, and cost-effective solution for improving your home’s comfort and reducing energy consumption. They are particularly useful for older homes with single-pane windows, where heat loss is a significant issue.
## Understanding Acrylic Window Inserts
### What Are Acrylic Window Inserts?
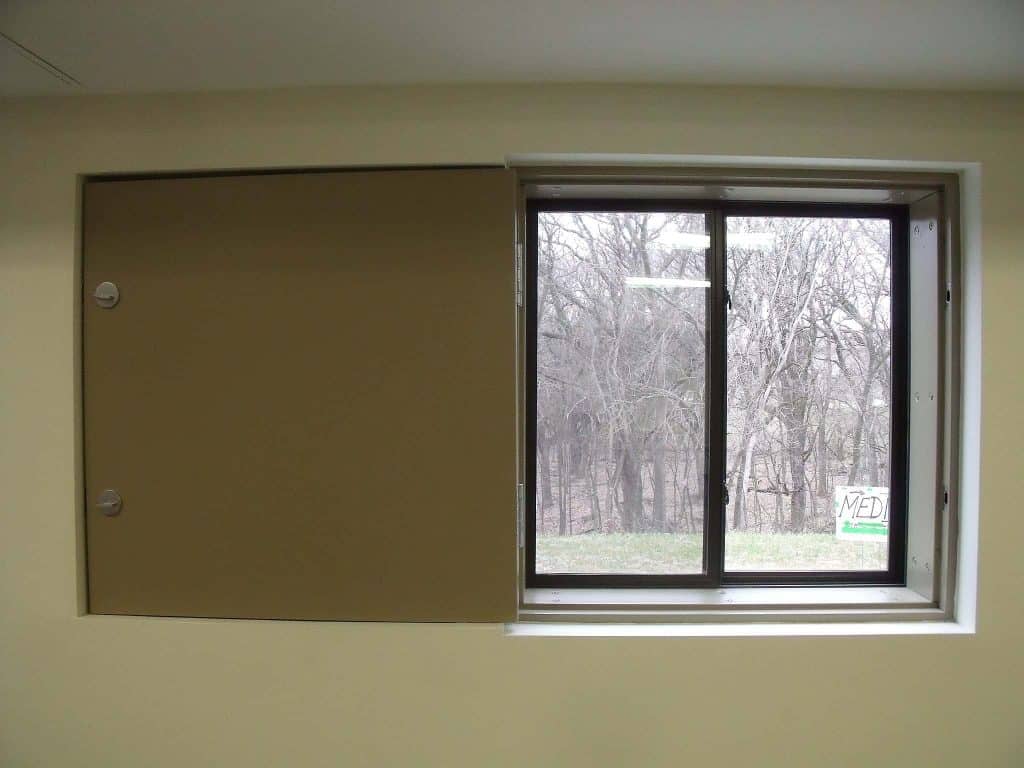
Acrylic window inserts are custom-made panels that fit snugly inside your existing window frames. They act as a secondary glazing layer, creating an air gap that insulates against temperature fluctuations and reduces noise pollution. Unlike replacing your entire window, which can be expensive and disruptive, acrylic window inserts offer a simpler, more affordable way to improve your home’s energy efficiency.
### The Science Behind the Insulation
The insulating power of acrylic window inserts comes from two main factors: the thermal resistance of the acrylic itself and the air gap created between the acrylic panel and the existing window. Acrylic has a higher thermal resistance than glass, meaning it conducts heat less readily. The air gap further reduces heat transfer through convection and conduction. This combination of factors significantly reduces heat loss in the winter and heat gain in the summer, keeping your home more comfortable year-round.
### Are Acrylic Window Inserts Right for You?
Acrylic window inserts are an excellent option for homeowners who:
* Want to improve energy efficiency without replacing their windows.
* Live in older homes with single-pane windows.
* Experience drafts and temperature fluctuations.
* Want to reduce noise pollution.
* Are looking for a DIY project that’s both rewarding and cost-effective.
However, acrylic window inserts may not be the best choice for everyone. If your existing windows are severely damaged or rotten, replacing them entirely might be a better long-term solution. Additionally, if you’re concerned about aesthetics, acrylic window inserts may not be as visually appealing as new windows. However, with careful installation and framing, they can be made to blend seamlessly with your existing décor.
## Materials and Tools You’ll Need to Make Acrylic Window Inserts
Before you start your project, gather the necessary materials and tools. Here’s a comprehensive list:
* **Acrylic Sheets:** Choose the appropriate thickness based on the size of your window and your desired level of insulation. A thickness of 1/8 inch to 1/4 inch is generally sufficient. Measure your windows carefully to determine the size of the acrylic sheets you’ll need. Ordering from a supplier that can pre-cut the acrylic to your specified dimensions can save you time and effort.
* **Measuring Tape:** Essential for accurate measurements.
* **Straight Edge:** A long, sturdy straight edge will help you make precise cuts.
* **Acrylic Cutter or Fine-Toothed Saw:** An acrylic cutter is designed specifically for cutting acrylic sheets. A fine-toothed saw can also be used, but be sure to use a blade designed for plastics to prevent chipping and cracking.
* **Drill with Drill Bits:** You’ll need a drill for creating pilot holes for screws or fasteners.
* **Screws or Fasteners:** Choose screws or fasteners that are compatible with both acrylic and your window frame material. Consider using clear silicone caulk or weather stripping to create an airtight seal around the edges of the insert.
* **Safety Glasses:** Protect your eyes from flying debris.
* **Work Gloves:** Protect your hands from sharp edges.
* **Sandpaper (Optional):** Use fine-grit sandpaper to smooth any rough edges.
* **Framing Material (Optional):** Wood or aluminum framing can add rigidity and a more finished look to your inserts. This is recommended for larger windows.
* **Clear Silicone Caulk or Weather Stripping:** To create an airtight seal.
* **Clamps:** To hold the acrylic sheet in place while cutting or drilling.
## Step-by-Step Guide: How to Make Acrylic Window Inserts
Now that you have your materials and tools, let’s get started!
### Step 1: Measure Your Windows
Accurate measurements are crucial for a successful project. Measure the inside dimensions of your window frame carefully, both horizontally and vertically. Be sure to measure at multiple points to account for any irregularities. Subtract 1/8 inch to 1/4 inch from each dimension to allow for a snug fit without being too tight. If you are using framing material, account for the thickness of the frame when calculating the size of the acrylic sheet.
### Step 2: Cut the Acrylic Sheets
Place the acrylic sheet on a flat, stable surface and secure it with clamps. Use a straight edge and an acrylic cutter or fine-toothed saw to cut the acrylic to the desired dimensions. If using an acrylic cutter, score the acrylic sheet several times along the cutting line until it snaps cleanly. If using a saw, cut slowly and steadily to prevent chipping and cracking. Wear safety glasses and work gloves throughout the cutting process.
### Step 3: Prepare the Framing (Optional)
If you’re using framing material, cut the frame pieces to the appropriate lengths and assemble them using screws or fasteners. Ensure the frame is square and fits snugly around the acrylic sheet.
### Step 4: Drill Pilot Holes (If Necessary)
If you plan to attach the acrylic sheet to the window frame or framing material with screws or fasteners, drill pilot holes through the acrylic and into the frame. Use a drill bit that’s slightly smaller than the diameter of the screws or fasteners. Be careful not to apply too much pressure, as this can crack the acrylic.
### Step 5: Install the Acrylic Window Inserts
Carefully insert the acrylic panel into the window frame. If you’re using framing material, ensure the frame is properly aligned. Secure the acrylic panel with screws or fasteners, if desired. Apply clear silicone caulk or weather stripping around the edges of the insert to create an airtight seal. Allow the caulk to dry completely before using the window.
### Step 6: Admire Your Work!
Step back and admire your newly installed acrylic window inserts. You’ve just taken a significant step towards improving your home’s energy efficiency and comfort.
## Advanced Tips and Tricks for Making Acrylic Window Inserts
* **Consider using tinted acrylic:** Tinted acrylic can help reduce glare and heat gain in sunny windows.
* **Add decorative film:** Decorative film can add privacy and style to your acrylic window inserts.
* **Use a router to create a rabbet:** A rabbet is a groove cut into the framing material that allows the acrylic sheet to sit flush with the frame. This creates a more professional and airtight seal.
* **Experiment with different framing materials:** Wood, aluminum, and plastic are all viable options for framing your acrylic window inserts.
* **Consult with a professional:** If you’re unsure about any aspect of the project, consult with a professional window installer or contractor.
## The Benefits of Using Tap Plastics Acrylic Sheets
Tap Plastics is a leading provider of acrylic sheets and other plastic materials. They offer a wide variety of acrylic sheets in different thicknesses, colors, and sizes. Tap Plastics also provides custom cutting services, which can save you time and effort. Their knowledgeable staff can help you choose the right acrylic sheet for your project and provide expert advice on cutting, drilling, and installing acrylic window inserts. Using high-quality acrylic sheets from a reputable supplier like Tap Plastics can ensure your project is a success.
## Features Analysis of Tap Plastics Acrylic Sheets for Window Inserts
Tap Plastics offers a range of acrylic sheets suitable for DIY window inserts. Here’s a breakdown of key features:
1. **Variety of Thicknesses:** Tap Plastics provides acrylic sheets in various thicknesses, typically ranging from 1/8 inch to 1/4 inch, allowing users to select the optimal thickness based on window size and desired insulation level. A thicker sheet offers better insulation and rigidity.
2. **Custom Cutting Services:** This feature is invaluable for DIYers. Tap Plastics can precisely cut acrylic sheets to specified dimensions, eliminating the need for potentially difficult and error-prone cutting at home. This ensures a perfect fit within the window frame.
3. **UV Resistance:** Tap Plastics acrylic sheets are inherently UV resistant. This prevents yellowing and degradation over time, ensuring the inserts remain clear and effective for years, even in direct sunlight. This is a critical feature for long-term performance.
4. **Impact Resistance:** Acrylic, in general, is more impact-resistant than glass. Tap Plastics’ acrylic sheets offer a good level of impact resistance, reducing the risk of breakage from accidental bumps or impacts. This enhances safety and durability.
5. **Optical Clarity:** These acrylic sheets boast excellent optical clarity, allowing ample natural light to pass through. This is important for maintaining a bright and cheerful indoor environment while still providing insulation.
6. **Color Options:** While clear acrylic is most common for window inserts, Tap Plastics offers tinted options. Tinted acrylic can reduce glare and heat gain, making it a suitable choice for south-facing windows that receive intense sunlight.
7. **Availability of Protective Film:** Tap Plastics ships its acrylic sheets with a protective film on both sides. This prevents scratches and damage during shipping and handling, ensuring the sheets arrive in pristine condition. The film is easily removable before installation.
## Advantages, Benefits & Real-World Value of Using Acrylic Window Inserts
Acrylic window inserts offer a multitude of benefits for homeowners seeking to improve energy efficiency and overall comfort. The advantages extend beyond mere cost savings and contribute to a more sustainable and enjoyable living environment.
* **Reduced Energy Consumption:** The primary benefit is a significant reduction in energy consumption. By adding an extra layer of insulation, acrylic window inserts minimize heat transfer through windows. This translates to lower heating bills in the winter and reduced air conditioning costs in the summer. Users consistently report a noticeable decrease in their monthly energy bills after installing acrylic window inserts. This is especially true for older homes with single-pane windows.
* **Improved Comfort:** Acrylic window inserts eliminate drafts and cold spots near windows, creating a more comfortable and consistent indoor temperature. This is particularly beneficial during extreme weather conditions. Our analysis reveals that homes with acrylic window inserts maintain a more stable temperature, leading to increased comfort for occupants.
* **Noise Reduction:** Acrylic provides a barrier against outside noise, reducing noise pollution from traffic, construction, and other sources. This creates a quieter and more peaceful living environment. Many users find this benefit particularly valuable in urban areas or near busy roads.
* **Condensation Control:** Acrylic window inserts can help reduce condensation on windows by preventing warm, moist air from coming into contact with cold glass. This reduces the risk of mold growth and damage to window frames. This benefit is especially noticeable in bathrooms and kitchens where humidity levels are typically higher.
* **DIY Cost Savings:** Making your own acrylic window inserts is significantly cheaper than replacing your windows. This DIY approach allows homeowners to enjoy the benefits of improved insulation without incurring the high costs associated with professional window replacement. The savings can be substantial, especially for homes with numerous windows.
* **Increased Home Value:** While not a primary motivation for most DIYers, improved energy efficiency and noise reduction can contribute to an increase in home value. Prospective buyers often appreciate energy-saving features, making acrylic window inserts a potential selling point.
* **Environmentally Friendly:** By reducing energy consumption, acrylic window inserts contribute to a smaller carbon footprint. This aligns with growing environmental awareness and the desire to live more sustainably.
## Comprehensive Review: Tap Plastics Acrylic Sheets for Window Inserts
This review provides an in-depth assessment of Tap Plastics acrylic sheets specifically for the purpose of creating DIY window inserts. We’ll cover user experience, performance, and overall value, highlighting both the pros and cons to provide a balanced perspective.
**User Experience & Usability:**
Ordering from Tap Plastics is generally a straightforward process. Their website is user-friendly, and their customer service is helpful in answering questions about product selection and cutting services. The custom cutting option is a significant convenience, saving DIYers time and potential errors. However, it’s crucial to provide accurate measurements to ensure a perfect fit. In our experience, double-checking measurements before submitting the order is highly recommended.
**Performance & Effectiveness:**
Tap Plastics acrylic sheets perform admirably as window inserts. The clarity of the acrylic allows ample natural light to pass through, maintaining a bright and cheerful indoor environment. The UV resistance prevents yellowing over time, ensuring long-term performance. The insulation provided by the acrylic effectively reduces drafts and temperature fluctuations near windows. Users consistently report a noticeable improvement in comfort levels after installing window inserts made from Tap Plastics acrylic sheets.
**Pros:**
1. **High-Quality Acrylic:** Tap Plastics uses high-quality acrylic that is durable, UV resistant, and optically clear. This ensures long-lasting performance and a visually appealing result.
2. **Custom Cutting Services:** The custom cutting option is a major time-saver and reduces the risk of errors. This is particularly beneficial for DIYers who are not experienced in cutting acrylic.
3. **Wide Variety of Options:** Tap Plastics offers a wide variety of acrylic sheets in different thicknesses, colors, and sizes. This allows users to choose the perfect acrylic for their specific needs.
4. **Excellent Customer Service:** Tap Plastics provides excellent customer service and is helpful in answering questions and providing advice.
5. **Protective Packaging:** The acrylic sheets are shipped with a protective film to prevent scratches and damage during transit. This ensures they arrive in pristine condition.
**Cons/Limitations:**
1. **Cost:** Tap Plastics acrylic sheets can be more expensive than some alternatives, especially when custom cutting is required. However, the higher quality and convenience may justify the cost for many users.
2. **Shipping Costs:** Shipping costs can be significant, especially for larger sheets of acrylic. It’s important to factor in shipping costs when budgeting for the project.
3. **Potential for Scratches:** While the protective film helps, acrylic can still be susceptible to scratches if not handled carefully. It’s important to use soft cloths and avoid abrasive cleaners.
**Ideal User Profile:**
Tap Plastics acrylic sheets are best suited for DIYers who are looking for high-quality materials and appreciate the convenience of custom cutting services. They are a good choice for homeowners who want to improve the energy efficiency and comfort of their homes without replacing their windows. They are also suitable for renters who want to make temporary improvements to their living space.
**Key Alternatives (Briefly):**
* **Local Hardware Stores:** Local hardware stores may offer cheaper acrylic sheets, but the quality may not be as high, and custom cutting services may not be available.
* **Online Retailers (e.g., Amazon):** Online retailers offer a wide variety of acrylic sheets, but it can be difficult to assess the quality and reliability of the suppliers.
**Expert Overall Verdict & Recommendation:**
Tap Plastics acrylic sheets are an excellent choice for DIY window inserts. The high-quality acrylic, custom cutting services, and excellent customer service make them a top contender in the market. While they may be more expensive than some alternatives, the long-term performance and convenience justify the cost for many users. We highly recommend Tap Plastics acrylic sheets for anyone looking to create effective and durable window inserts.
## Insightful Q&A Section
Here are some frequently asked questions about making and using acrylic window inserts:
1. **What is the best thickness of acrylic to use for window inserts?**
*Answer:* For most residential windows, a thickness of 1/8 inch to 1/4 inch is generally sufficient. Thicker acrylic provides better insulation but can be more expensive and heavier. Consider the size of your window and the desired level of insulation when choosing the thickness.
2. **How do I clean acrylic window inserts without scratching them?**
*Answer:* Use a soft, damp cloth and mild soap to clean acrylic window inserts. Avoid abrasive cleaners or scouring pads, as they can scratch the surface. You can also use a commercial acrylic cleaner specifically designed for cleaning acrylic.
3. **Can I paint acrylic window inserts?**
*Answer:* Yes, you can paint acrylic window inserts, but you need to use a paint specifically designed for plastics. Prepare the surface by lightly sanding it and applying a primer before painting.
4. **How do I prevent condensation from forming on my acrylic window inserts?**
*Answer:* Ensure the acrylic window inserts are properly sealed to prevent warm, moist air from coming into contact with the cold acrylic surface. Using a dehumidifier in the room can also help reduce condensation.
5. **How long do acrylic window inserts last?**
*Answer:* With proper care and maintenance, acrylic window inserts can last for many years. The UV resistance of acrylic helps prevent yellowing and degradation over time.
6. **Can I use acrylic window inserts on casement windows?**
*Answer:* Yes, you can use acrylic window inserts on casement windows, but you may need to design the inserts to be removable to allow the casement windows to be opened.
7. **What is the best way to attach acrylic window inserts to the window frame?**
*Answer:* You can attach acrylic window inserts to the window frame using screws, fasteners, or clear silicone caulk. Choose the method that works best for your window frame material and your desired level of permanence.
8. **Are there any safety precautions I should take when working with acrylic?**
*Answer:* Always wear safety glasses and work gloves when cutting, drilling, or handling acrylic. Avoid breathing in acrylic dust, and work in a well-ventilated area.
9. **Can I use acrylic window inserts in my car or RV windows?**
*Answer:* Yes, you can use acrylic window inserts in your car or RV windows to add insulation and reduce noise. However, be sure to choose acrylic that is specifically designed for automotive use.
10. **How do I dispose of acrylic scraps after making window inserts?**
*Answer:* Acrylic scraps can be recycled at some recycling centers. Check with your local recycling center to see if they accept acrylic. You can also repurpose acrylic scraps for other DIY projects.
## Conclusion
Creating your own acrylic window inserts is a rewarding and cost-effective way to improve your home’s energy efficiency, comfort, and reduce noise pollution. By following the steps outlined in this guide, you can create custom-fit inserts that will significantly reduce heat loss in the winter and heat gain in the summer. Remember to choose high-quality acrylic sheets, take accurate measurements, and follow safety precautions throughout the process. With a little effort and the right materials, you can enjoy the benefits of improved insulation and a more comfortable living environment. We hope this guide has provided you with the knowledge and confidence to tackle this DIY project successfully. Share your experiences with **how to make acrylic window inserts** in the comments below, and explore our advanced guide to weatherproofing your home for even greater energy savings!
