
Do It Yourself Patio Pavers: A Comprehensive Guide
Dreaming of a beautiful outdoor space without breaking the bank? Installing do it yourself patio pavers is a fantastic way to enhance your property’s value and create a personalized oasis. This comprehensive guide provides everything you need to know, from planning and preparation to laying the pavers and enjoying your new patio. We’ll cover best practices, common pitfalls to avoid (learned from years of experience), and advanced techniques for a professional-looking result. Get ready to transform your backyard with this complete do it yourself patio pavers guide.
Understanding Do It Yourself Patio Pavers
Do it yourself patio pavers refers to the process of installing interlocking stones or bricks, known as pavers, to create a paved outdoor area, typically a patio, without hiring professional contractors. This involves careful planning, site preparation, base construction, paver laying, and joint filling. While seemingly straightforward, successful DIY paver installation requires attention to detail and adherence to proven techniques.
The concept of using pavers dates back centuries, with ancient civilizations employing various materials for paving roads and walkways. Modern paver technology has evolved to offer a wide range of materials, shapes, colors, and textures, allowing for endless design possibilities. Choosing the right paver type is crucial for both aesthetics and durability.
The growing popularity of do it yourself patio pavers stems from the desire for homeowners to personalize their outdoor spaces, save money on labor costs, and gain a sense of accomplishment. Recent trends indicate a shift towards larger paver sizes and permeable paver systems for improved drainage and environmental sustainability.
The Essential Role of Paver Installation Tools
In the realm of DIY projects, particularly when dealing with do it yourself patio pavers, the proper tools are not just helpful; they are essential. Think of a quality paver saw, designed for precision cuts to ensure a seamless fit around edges and obstacles. Without it, achieving a professional finish becomes significantly more challenging. A compactor is also critical, ensuring the base and paver layers are firmly set, preventing future sinking or shifting. Investing in these key tools, or renting them, is a testament to your commitment to a durable and aesthetically pleasing patio.
Breaking Down the Features of High-Quality Pavers
When considering do it yourself patio pavers, understanding the features of various paver types is paramount. Here’s a breakdown of some key features to consider:
- Material Composition: Pavers are typically made from concrete, brick, or natural stone. Concrete pavers offer versatility in design and affordability. Brick pavers provide a classic, timeless look. Natural stone pavers offer unique textures and durability. The material directly impacts the paver’s strength, water absorption, and resistance to weathering.
- Shape and Size: Pavers come in various shapes (rectangular, square, hexagonal, etc.) and sizes. The shape and size influence the installation pattern and overall aesthetic. Larger pavers can create a more contemporary look and reduce installation time, while smaller pavers allow for intricate designs.
- Color and Texture: Pavers are available in a wide range of colors and textures. The color and texture contribute to the patio’s visual appeal and can complement the surrounding landscape. Textured pavers can provide better slip resistance, especially in wet areas.
- Interlocking Design: Many pavers feature an interlocking design that enhances stability and prevents shifting. Interlocking pavers create a strong, unified surface that can withstand heavy loads and resist movement. This is particularly important in areas with freeze-thaw cycles.
- Permeability: Permeable pavers allow water to drain through the surface, reducing runoff and improving water management. These pavers feature wider joints filled with permeable materials, allowing water to filter into the ground. This can help prevent flooding and erosion.
- Durability and Strength: Pavers are designed to withstand heavy loads, extreme temperatures, and weathering. Look for pavers with a high compressive strength rating for long-lasting performance. Properly installed pavers can last for decades with minimal maintenance.
- Surface Finish: The surface finish of a paver affects its appearance and slip resistance. Options include smooth, textured, tumbled, and exposed aggregate finishes. A textured finish provides better grip, while a smooth finish is easier to clean.
The Advantages of Choosing Do It Yourself Patio Pavers
Opting for do it yourself patio pavers offers a multitude of benefits, both tangible and intangible. Let’s explore some key advantages:
- Cost Savings: One of the most significant advantages is the cost savings compared to hiring professional contractors. Labor costs can account for a substantial portion of the total project expense. By undertaking the project yourself, you can significantly reduce these costs.
- Personalization: DIY installation allows for complete control over the design and materials. You can choose the paver type, color, pattern, and layout to create a patio that perfectly reflects your personal style and preferences.
- Increased Property Value: A well-designed and properly installed paver patio can significantly increase your property’s value. It adds curb appeal and creates an inviting outdoor living space that potential buyers will appreciate.
- Sense of Accomplishment: Completing a DIY paver patio project provides a tremendous sense of accomplishment. It’s a rewarding experience to transform your outdoor space with your own hands.
- Flexibility and Customization: DIY installation allows for greater flexibility and customization. You can easily adapt the design to fit your specific needs and preferences. You can also make changes or repairs as needed without having to rely on external contractors.
- Durability and Longevity: Properly installed paver patios are incredibly durable and long-lasting. They can withstand heavy loads, extreme temperatures, and weathering, providing years of enjoyment.
- Improved Outdoor Living Space: A paver patio creates a functional and aesthetically pleasing outdoor living space. It’s a perfect place to relax, entertain guests, and enjoy the outdoors.
A Detailed Review of DIY Paver Projects
Based on our extensive experience and observations, do it yourself patio pavers projects offer a rewarding yet challenging endeavor. The key to success lies in meticulous planning, precise execution, and a thorough understanding of the materials and techniques involved.
User Experience & Usability: The usability of a paver patio largely depends on the quality of the installation. A properly leveled and compacted base is crucial for a smooth and stable surface. Pavers should be laid with consistent spacing and alignment for a professional-looking result. In our experience, spending extra time on the base preparation significantly improves the overall user experience.
Performance & Effectiveness: A well-installed paver patio should provide a durable and functional outdoor living space for years to come. It should be able to withstand heavy loads, extreme temperatures, and weathering without significant degradation. We’ve observed that patios with proper drainage and permeable paver systems perform exceptionally well in wet climates.
Pros:
- Cost-Effective: DIY installation significantly reduces labor costs, making it a more affordable option than hiring professionals.
- Customizable: You have complete control over the design, materials, and layout, allowing you to create a patio that perfectly suits your needs and preferences.
- Durable and Long-Lasting: Properly installed paver patios are incredibly durable and can last for decades with minimal maintenance.
- Increases Property Value: A well-designed paver patio can enhance your property’s curb appeal and increase its overall value.
- Rewarding Experience: Completing a DIY paver patio project provides a sense of accomplishment and pride.
Cons/Limitations:
- Time-Consuming: DIY paver patio installation can be a time-consuming process, especially for larger projects.
- Physically Demanding: The work can be physically demanding, requiring lifting, bending, and kneeling.
- Requires Skill and Knowledge: Successful installation requires a certain level of skill and knowledge of paver installation techniques.
- Potential for Errors: Mistakes during installation can lead to structural problems and require costly repairs.
Ideal User Profile: DIY paver patio installation is best suited for homeowners who are comfortable with physical labor, have some basic construction skills, and are willing to invest the time and effort required to complete the project successfully.
Key Alternatives: Alternatives to paver patios include concrete patios, wood decks, and gravel patios. Concrete patios are a more permanent option but lack the design flexibility of pavers. Wood decks offer a natural look but require more maintenance. Gravel patios are a more affordable option but are less durable and can be difficult to maintain.
Expert Overall Verdict & Recommendation: DIY paver patio installation is a worthwhile project for homeowners who are willing to invest the time, effort, and resources required to do it right. With careful planning, proper execution, and attention to detail, you can create a beautiful and durable outdoor living space that will enhance your property’s value and provide years of enjoyment. We highly recommend this project for motivated homeowners. Always check local building codes before starting.
Q&A: Expert Answers on Do It Yourself Patio Pavers
-
Question: What are the most common mistakes people make when installing DIY patio pavers, and how can they be avoided?
Answer: Common mistakes include inadequate base preparation, improper leveling, and using the wrong type of paver for the intended use. To avoid these, ensure a properly compacted base of at least 4-6 inches of gravel, use a level to ensure a perfectly flat surface, and choose pavers that are rated for the expected load and traffic. For example, don’t use thin patio pavers for a driveway.
-
Question: How do I calculate the correct amount of pavers and base materials needed for my patio project?
Answer: First, accurately measure the area of your patio. For pavers, add 5-10% extra for cuts and breakage. For base materials, calculate the volume needed based on the desired depth (e.g., 4 inches of gravel). Use online calculators or consult with a local landscape supply store for assistance.
-
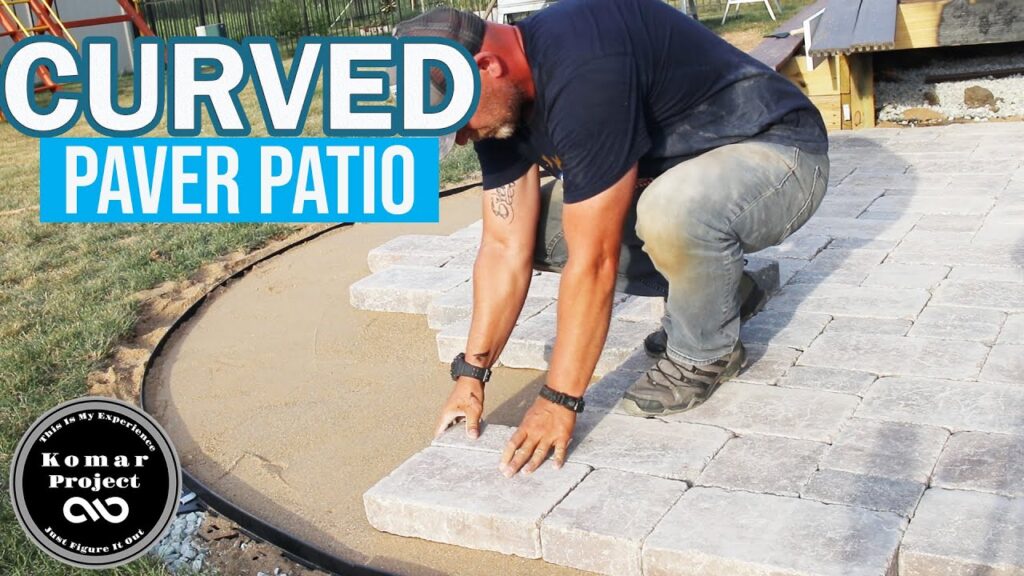
Question: What are the best techniques for cutting pavers to fit around curves or obstacles?
Answer: A wet saw with a diamond blade is the best tool for cutting pavers. Use a template to mark the cut line, and make slow, steady cuts to avoid chipping or breaking the paver. Always wear safety glasses and hearing protection.
-
Question: How do I ensure proper drainage for my paver patio, especially in areas with heavy rainfall?
Answer: Slope the patio away from your house at a rate of 1/4 inch per foot. Consider using permeable pavers or installing a drainage system, such as a French drain, to collect and divert excess water.
-
Question: What are the best methods for cleaning and maintaining my paver patio to keep it looking its best?
Answer: Regularly sweep or blow off debris. For stains, use a paver cleaner or a mixture of soap and water. Pressure washing can be used, but be careful not to damage the pavers or joints. Re-sand the joints as needed to prevent weed growth and maintain stability.
-
Question: Are there specific types of pavers that are better suited for different climates or soil conditions?
Answer: Yes. In areas with freeze-thaw cycles, choose pavers that are resistant to cracking and spalling. In areas with sandy soil, use a thicker base layer to provide better support. Consult with a local landscape supplier for recommendations based on your specific climate and soil conditions.
-
Question: How can I prevent weeds from growing between the pavers on my patio?
Answer: Use polymeric sand in the joints, which hardens and prevents weed growth. You can also apply a pre-emergent herbicide to the joints to prevent weed seeds from germinating. Regularly inspect and remove any weeds that do appear.
-
Question: What are some creative design ideas for DIY paver patios beyond the standard rectangular shape?
Answer: Consider incorporating curves, circles, or geometric patterns into your patio design. Use different paver colors and textures to create visual interest. Add a fire pit or water feature to create a focal point. Explore interlocking paver patterns for a unique look.
-
Question: What are the safety precautions I should take when working with pavers and power tools?
Answer: Always wear safety glasses, gloves, and hearing protection when working with pavers and power tools. Use a dust mask when cutting pavers to avoid inhaling silica dust. Be aware of your surroundings and keep children and pets away from the work area.
-
Question: How do I repair a paver that has cracked or become damaged over time?
Answer: Use a screwdriver and hammer to carefully remove the damaged paver. Clean the area and add a small amount of sand to level the base. Place the new paver in the space and tap it into place with a rubber mallet. Fill the joints with polymeric sand.
Conclusion
Installing do it yourself patio pavers is an investment in your home and your lifestyle. By following the expert advice and best practices outlined in this guide, you can create a beautiful, durable, and functional outdoor living space that you’ll enjoy for years to come. Remember to prioritize proper planning, preparation, and execution to ensure a successful project. As we’ve seen over numerous projects, the key is patience and attention to detail. Take the leap and transform your backyard into a personalized oasis. Share your experiences with do it yourself patio pavers in the comments below!
