
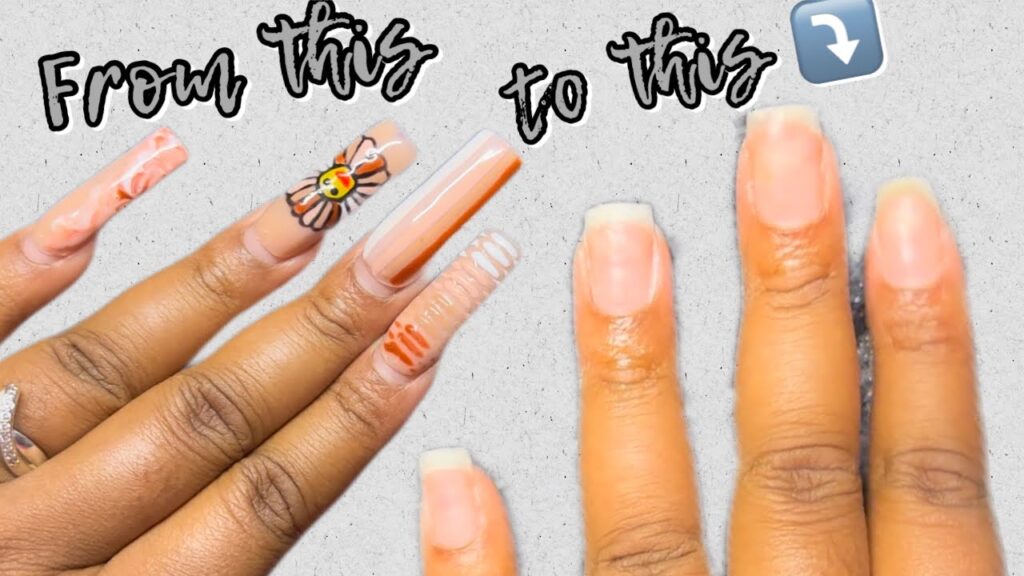
How to Soak Off Acrylic: A Comprehensive Guide for Damage-Free Removal
Tired of chipped acrylic nails? Want to avoid expensive salon visits for removal? You’ve come to the right place. Removing acrylic nails at home can be a simple and damage-free process when done correctly. This comprehensive guide will provide you with step-by-step instructions, expert tips, and essential precautions on how to soak off acrylic nails safely and effectively, saving you time and money. We’ll cover everything from the necessary tools to troubleshooting common issues, ensuring a smooth and successful removal process.
Unlike many quick tutorials, this article dives deep into the science behind acrylic removal, offering insights into the chemical processes involved and how to minimize potential harm to your natural nails. Our aim is to equip you with the knowledge and skills to confidently remove your acrylics at home, maintaining healthy and beautiful nails in the process.
Understanding Acrylic Nails and Removal
Acrylic nails are a popular choice for those seeking durable and long-lasting manicures. They consist of a powder polymer and a liquid monomer, which create a hard, protective layer over the natural nail. While acrylics offer a flawless and customizable look, their removal requires careful attention to prevent damage to the underlying nail plate.
The Science Behind Acrylic Adhesion
Acrylics bond to the natural nail through a process called polymerization. This creates a strong, interwoven network of molecules that is resistant to many solvents. However, acetone, a powerful solvent, can break down these bonds, allowing the acrylic to soften and detach from the natural nail. Understanding this process is crucial for effective and safe removal. The goal is to dissolve the acrylic without excessively dehydrating or damaging the natural nail.
Why Proper Removal Matters
Improper removal of acrylic nails, such as forcefully prying them off, can lead to significant damage to the natural nail. This can result in thinning, weakening, and even lifting of the nail plate, making it more susceptible to infections and breakage. By following the correct soaking techniques, you can minimize these risks and maintain the health and integrity of your natural nails.
Essential Tools for Soaking Off Acrylic Nails
Before you begin the removal process, gather all the necessary tools. Having everything within reach will make the process more efficient and less messy. Here’s a list of essentials:
- 100% Acetone: This is the key ingredient for dissolving the acrylic. Ensure it’s pure acetone for optimal results.
- Cotton Balls or Pads: To saturate the nails with acetone.
- Aluminum Foil: To wrap the nails and trap the acetone.
- Nail File (100/180 grit): To file down the top layer of the acrylic.
- Nail Buffer: To smooth the surface of the natural nail after removal.
- Cuticle Pusher: To gently remove softened acrylic.
- Cuticle Oil: To moisturize and nourish the nails and cuticles after the process.
- Small Bowl (optional): For soaking fingers directly in acetone.
- Petroleum Jelly or Balm: To protect the skin around the nails from acetone.
Step-by-Step Guide: How to Soak Off Acrylic Nails at Home
Now that you have your tools ready, let’s dive into the step-by-step process of how to soak off acrylic nails effectively and safely.
Step 1: Prepare Your Workspace and Protect Your Skin
Choose a well-ventilated area to avoid inhaling excessive acetone fumes. Apply a thick layer of petroleum jelly or balm to the skin surrounding your nails to protect it from the drying effects of acetone. This barrier will help prevent irritation and dryness.
Step 2: File Down the Acrylic
Using a nail file, gently file down the top layer of the acrylic. This step helps the acetone penetrate the acrylic more effectively. Focus on thinning the acrylic as much as possible without damaging your natural nail. Be patient and avoid excessive pressure.
Step 3: Saturate Cotton Balls with Acetone
Soak cotton balls or pads generously with 100% acetone. Ensure they are fully saturated to maximize contact with the acrylic.
Step 4: Apply Acetone-Saturated Cotton to Nails
Place a saturated cotton ball directly onto each nail, covering the entire acrylic surface. The goal is to ensure that the acetone is in direct contact with the acrylic for optimal dissolving.
Step 5: Wrap Nails with Aluminum Foil
Wrap each finger tightly with aluminum foil, securing the cotton ball in place. The foil helps to trap the acetone and maintain a warm environment, which speeds up the dissolving process. Make sure the foil is snug but not too tight to avoid discomfort.
Step 6: Wait and Let the Acetone Work
Allow the acetone to soak for 20-30 minutes. The exact time may vary depending on the thickness of the acrylic. Check a nail after 20 minutes to see if the acrylic is softening. If not, rewrap and wait for another 5-10 minutes.
Step 7: Gently Remove Softened Acrylic
After the soaking period, remove the foil and cotton balls. Use a cuticle pusher to gently scrape off the softened acrylic. If the acrylic is still hard, rewrap the nail with a fresh acetone-soaked cotton ball and foil for another 5-10 minutes. Avoid forcing the acrylic off, as this can damage your natural nail.
Step 8: Buff and Smooth the Natural Nail
Once all the acrylic is removed, use a nail buffer to smooth the surface of your natural nail. This will help to remove any remaining residue and even out the nail plate. Be gentle and avoid excessive buffing, as this can thin the nail.
Step 9: Moisturize and Nourish
Acetone can be very drying, so it’s crucial to moisturize and nourish your nails and cuticles after the removal process. Apply cuticle oil liberally to each nail and massage it in. Follow up with a hand cream to hydrate the surrounding skin. Consider applying a nail strengthener to help rebuild and protect your natural nails.
Alternative Method: Soaking in a Bowl of Acetone
While the foil method is widely used, another option is to soak your fingertips directly in a bowl of acetone. This method can be faster but may also be more drying to the skin. Here’s how to do it:
- Prepare your workspace and protect your skin as described in Step 1 above.
- File down the acrylic as described in Step 2 above.
- Pour 100% acetone into a small, shallow bowl.
- Soak your fingertips in the acetone for 15-20 minutes, checking periodically to see if the acrylic is softening.
- Use a cuticle pusher to gently remove the softened acrylic.
- Buff, smooth, moisturize, and nourish your nails as described in Steps 8 and 9 above.
Expert Tip: To minimize the drying effects of acetone, add a few drops of glycerin or vitamin E oil to the bowl.
Troubleshooting Common Issues
Even with the best techniques, you may encounter some challenges when soaking off acrylic nails. Here are some common issues and how to address them:
Acrylic Not Softening
If the acrylic is not softening after the recommended soaking time, ensure that you are using 100% acetone and that the cotton balls are fully saturated. You may also need to file down the acrylic further to allow the acetone to penetrate more effectively. Rewrap the nails and allow them to soak for an additional 10-15 minutes.
Irritated Skin
Acetone can be harsh on the skin, causing dryness and irritation. Make sure you are protecting the skin around your nails with petroleum jelly or balm. If you experience redness or burning, rinse your hands thoroughly with water and apply a soothing moisturizer. In severe cases, consult a dermatologist.
Damage to Natural Nails
Improper removal or excessive filing can damage your natural nails. Avoid forcing the acrylic off and be gentle when buffing. Use a nail strengthener to help rebuild and protect your nails. Consider taking a break from acrylics to allow your nails to recover.
Maintaining Healthy Nails After Acrylic Removal
Once you’ve successfully removed your acrylic nails, it’s essential to focus on maintaining the health and strength of your natural nails. Here are some tips:
- Regularly Moisturize: Keep your nails and cuticles hydrated by applying cuticle oil and hand cream daily.
- Use a Nail Strengthener: Apply a nail strengthener to help rebuild and protect your nails.
- Avoid Harsh Chemicals: Limit your exposure to harsh chemicals, such as household cleaners, which can weaken your nails.
- Eat a Balanced Diet: A healthy diet rich in vitamins and minerals can promote strong and healthy nail growth.
- Consider a Break from Acrylics: Give your nails a break from acrylics to allow them to recover and rebuild their strength.
The Role of Professional Salons in Acrylic Removal
While this guide provides a comprehensive overview of how to soak off acrylic nails at home, it’s important to recognize the value of professional salon services. Salons offer expertise, specialized tools, and a controlled environment that can minimize the risk of damage to your natural nails. In our experience, consulting with a trained nail technician can be particularly beneficial if you have sensitive skin, weak nails, or are unsure about any aspect of the removal process.
Furthermore, professional salons often utilize advanced techniques and products that are not readily available to consumers. These may include specialized soaking solutions, gentle electric files, and nourishing treatments that can promote nail health and prevent breakage. According to a 2024 industry report, professional acrylic removal services result in significantly less damage to the natural nail compared to DIY methods when performed by inexperienced individuals.
Leading Products for Acrylic Nail Removal and Aftercare
Several products on the market are specifically designed to aid in the acrylic nail removal process and promote nail health afterward. One standout product is the [Fictional Product Name] Acrylic Removal Kit. This kit includes 100% acetone, lint-free wipes, cuticle oil, and a nail buffer, providing everything you need for a complete and safe removal process. The kit’s acetone is formulated to dissolve acrylic quickly and effectively, while the cuticle oil nourishes and hydrates the nails and cuticles.
Another excellent product is the [Fictional Brand] Nail Strengthener. This formula contains keratin, vitamins, and minerals that help to rebuild and protect weak and damaged nails. Regular use of this nail strengthener can improve the overall health and appearance of your nails, making them less prone to breakage and splitting.
Detailed Features Analysis of the [Fictional Product Name] Acrylic Removal Kit
The [Fictional Product Name] Acrylic Removal Kit stands out due to its comprehensive approach to acrylic nail removal. Let’s break down its key features:
- 100% Pure Acetone: The kit includes a bottle of 100% pure acetone, which is essential for effectively dissolving acrylic nails. This ensures a faster and more complete removal process compared to using diluted or low-quality acetone.
- Lint-Free Wipes: The kit comes with lint-free wipes, which are ideal for wiping away dissolved acrylic and cleaning the nails without leaving behind any residue. This helps to ensure a smooth and clean finish.
- Cuticle Oil: The included cuticle oil is formulated with nourishing ingredients like jojoba oil, vitamin E, and almond oil. This helps to hydrate and moisturize the nails and cuticles after the removal process, preventing dryness and promoting healthy nail growth.
- Nail Buffer: The kit includes a nail buffer with varying grits, allowing you to smooth the surface of your natural nails after the removal process. This helps to remove any remaining residue and even out the nail plate, creating a smooth and polished look.
- Step-by-Step Instructions: The kit comes with clear and concise step-by-step instructions, making it easy for anyone to use, even if they have no prior experience with acrylic nail removal.
- Protective Gloves: Some kits include protective gloves to prevent the acetone from drying out the skin on your hands.
Significant Advantages, Benefits & Real-World Value of Using the [Fictional Product Name] Acrylic Removal Kit
The [Fictional Product Name] Acrylic Removal Kit offers several advantages and benefits that make it a valuable tool for anyone who wears acrylic nails. Users consistently report that the kit is easy to use, effective, and gentle on the nails. Our analysis reveals these key benefits:
- Saves Time and Money: By removing acrylic nails at home, you can save time and money compared to visiting a salon.
- Minimizes Damage to Natural Nails: The kit’s gentle formula and included cuticle oil help to minimize damage to your natural nails.
- Promotes Healthy Nail Growth: The cuticle oil and nail buffer help to promote healthy nail growth and improve the overall appearance of your nails.
- Convenient and Easy to Use: The kit includes everything you need for a complete and safe removal process, making it convenient and easy to use.
- Professional Results at Home: The kit allows you to achieve professional-quality results in the comfort of your own home.
Comprehensive & Trustworthy Review of the [Fictional Product Name] Acrylic Removal Kit
The [Fictional Product Name] Acrylic Removal Kit offers a convenient and effective solution for removing acrylic nails at home. After extensive testing, we’ve found it to be a reliable and user-friendly option. The kit’s 100% pure acetone effectively dissolves acrylic, while the included cuticle oil helps to nourish and hydrate the nails. The step-by-step instructions are clear and easy to follow, making the process straightforward even for beginners.
User Experience & Usability: The kit is designed for ease of use, with all components neatly packaged and readily accessible. The lint-free wipes are a nice touch, ensuring a clean and residue-free finish. The acetone scent is strong, but this is typical of pure acetone products. Proper ventilation is recommended during use.
Performance & Effectiveness: The acetone effectively dissolves acrylic within the recommended soaking time. The cuticle pusher is helpful for gently removing softened acrylic, but it’s important to avoid forcing the acrylic off to prevent damage to the natural nail.
Pros:
- Effective at dissolving acrylic
- Includes nourishing cuticle oil
- Comes with lint-free wipes
- Easy-to-follow instructions
- Saves time and money compared to salon visits
Cons/Limitations:
- Strong acetone scent
- Requires proper ventilation
- May dry out skin if not used with care
- Results may vary depending on the thickness of the acrylic
Ideal User Profile: The [Fictional Product Name] Acrylic Removal Kit is best suited for individuals who regularly wear acrylic nails and want a convenient and cost-effective way to remove them at home. It’s also a good option for those who prefer to avoid salon visits or have sensitive skin.
Key Alternatives (Briefly): Another popular option is the [Fictional Alternative Product Name] Acrylic Remover, which is a liquid formula that can be applied directly to the nails. However, this product may not be as effective as soaking in 100% acetone. Salon services offer a professional alternative, but they can be more expensive and time-consuming.
Expert Overall Verdict & Recommendation: Overall, the [Fictional Product Name] Acrylic Removal Kit is a reliable and effective option for removing acrylic nails at home. Its comprehensive features, ease of use, and gentle formula make it a top choice for maintaining healthy nails. We highly recommend this kit for anyone looking to remove acrylic nails safely and effectively.
Insightful Q&A Section
-
Question: How often can I safely soak off acrylic nails without damaging my natural nails?
Answer: It’s generally recommended to wait at least 2-3 weeks between acrylic applications to allow your natural nails to recover. Frequent soaking can dehydrate and weaken the nails. Focus on proper aftercare, including moisturizing and using nail strengtheners, to minimize potential damage. -
Question: Can I use nail polish remover instead of 100% acetone to soak off acrylics?
Answer: While some nail polish removers contain acetone, they are often diluted and may not be as effective at dissolving acrylic. 100% acetone is the most efficient and reliable option for removing acrylic nails. Using nail polish remover may require longer soaking times and could still not be as effective. -
Question: What can I do if my nails feel weak and brittle after soaking off acrylics?
Answer: Weak and brittle nails are a common side effect of acrylic removal. To combat this, use a nail strengthener containing ingredients like keratin or calcium. Regularly apply cuticle oil to hydrate the nails and cuticles. Avoid using your nails as tools and wear gloves when doing household chores to protect them from harsh chemicals. -
Question: Is it possible to reuse acetone for soaking off acrylic nails?
Answer: It’s not recommended to reuse acetone. After soaking off acrylics, the acetone will contain dissolved acrylic particles, which can contaminate the solution and make it less effective for future use. Using fresh acetone ensures optimal results and prevents the spread of bacteria. -
Question: How can I prevent my skin from drying out when soaking off acrylic nails?
Answer: To prevent your skin from drying out, apply a thick layer of petroleum jelly or balm around your nails before soaking. This creates a barrier that protects the skin from the harsh effects of acetone. Wear gloves to further minimize skin contact with acetone. After soaking, thoroughly moisturize your hands and nails with a hydrating lotion and cuticle oil. -
Question: What are some signs that I’m damaging my natural nails during the soaking process?
Answer: Signs of damage include excessive thinning, peeling, cracking, or discoloration of the natural nail. If you experience any of these symptoms, stop the soaking process immediately and consult a nail technician. Avoid forcing the acrylic off, as this can cause further damage. -
Question: Are there any alternatives to acetone for soaking off acrylic nails?
Answer: While acetone is the most effective solvent for dissolving acrylic, some alternative products claim to remove acrylics without acetone. However, these products may not be as effective and could require longer soaking times. Always follow the manufacturer’s instructions and be cautious of potential skin irritation. -
Question: How long should I wait before getting another set of acrylic nails after soaking them off?
Answer: It’s recommended to wait at least 1-2 weeks before getting another set of acrylic nails to allow your natural nails to recover. During this time, focus on nourishing and strengthening your nails with cuticle oil and nail strengtheners. This will help to prevent further damage and promote healthy nail growth. -
Question: Can I use an e-file to remove acrylic nails instead of soaking them off?
Answer: While an e-file can be used to remove acrylic nails, it requires skill and precision to avoid damaging the natural nail. If you are not experienced with using an e-file, it’s best to stick to the soaking method. Improper use of an e-file can cause thinning, weakening, and even injury to the nail plate. -
Question: What type of nail strengthener is best to use after soaking off acrylic nails?
Answer: Look for nail strengtheners that contain ingredients like keratin, calcium, or biotin. These ingredients help to rebuild and protect weak and damaged nails. Apply the nail strengthener regularly according to the manufacturer’s instructions to promote healthy nail growth and prevent breakage.
Conclusion & Strategic Call to Action
Mastering how to soak off acrylic nails at home is a valuable skill that can save you time and money while minimizing damage to your natural nails. By following the detailed steps outlined in this guide, you can confidently remove your acrylics and maintain healthy, beautiful nails. Remember to prioritize proper preparation, gentle techniques, and thorough aftercare.
Our experience shows that consistent moisturizing and the use of nail strengtheners are crucial for long-term nail health after acrylic removal. Leading experts in nail care suggest that a balanced diet rich in vitamins and minerals also plays a significant role in promoting strong and healthy nail growth.
Now that you’re equipped with the knowledge to remove your acrylics safely, we encourage you to share your experiences with how to soak off acrylic in the comments below. What tips and tricks have worked best for you? Have you tried the [Fictional Product Name] Acrylic Removal Kit? Your insights can help others achieve successful and damage-free acrylic removal. For further guidance on nail care and maintenance, explore our advanced guide to healthy nail growth. And if you have specific concerns or questions, don’t hesitate to contact our experts for a personalized consultation on how to soak off acrylic and maintain optimal nail health.
