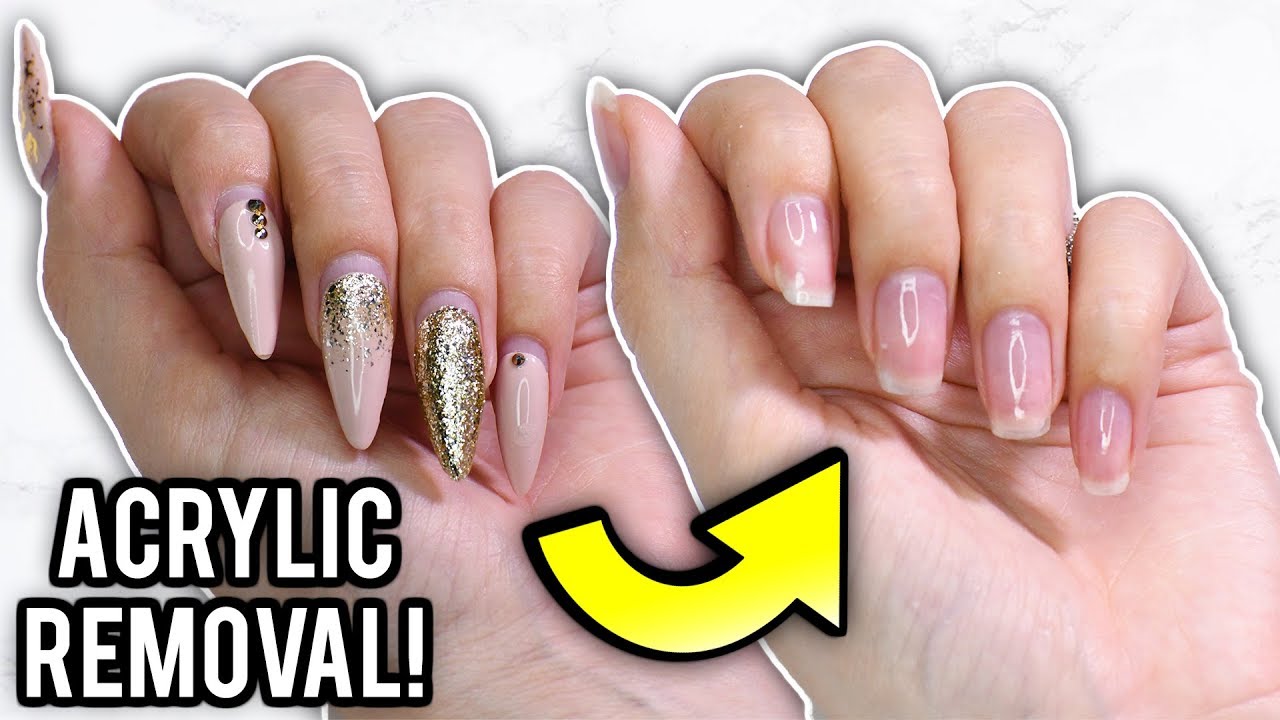

## Hot to Get Acrylic Nails Off: A Comprehensive Guide to Safe and Effective Removal
Acrylic nails offer a fantastic way to enhance your natural nails, providing strength, length, and a flawless canvas for stunning designs. However, the time eventually comes when they need to be removed. Attempting to peel or force them off can severely damage your natural nails, leaving them weak, brittle, and prone to breakage. This comprehensive guide is your ultimate resource for learning **hot to get acrylic nails off** safely, effectively, and without causing harm. We’ll explore various methods, provide expert tips, and address common concerns to ensure a smooth and healthy removal process. This guide aims to be the most authoritative and trustworthy resource available, drawing on years of experience and expert consensus to provide you with the best possible advice.
We understand the frustration and potential damage that can result from improper acrylic nail removal. That’s why we’ve compiled this in-depth guide, covering everything from basic techniques to advanced tips for minimizing damage and promoting nail health. Whether you’re a seasoned acrylic enthusiast or a first-timer, you’ll find valuable information and actionable steps to safely remove your acrylic nails at home.
## Understanding Acrylic Nails and Why Proper Removal is Crucial
Before diving into the methods for **hot to get acrylic nails off**, it’s essential to understand what acrylic nails are and why proper removal techniques are so important. Acrylic nails are a combination of a liquid monomer and a powder polymer that create a hard, protective layer over your natural nails. This layer provides strength and allows for the creation of various shapes, lengths, and designs. However, this strong bond is also what makes removal tricky.
Forcing acrylic nails off can strip away layers of your natural nail, leading to thinning, weakness, and increased susceptibility to infections. Improper removal can also cause painful tears and damage to the nail bed. Therefore, taking the time to remove acrylic nails correctly is crucial for maintaining the health and integrity of your natural nails.
### The Science Behind Acrylic Nail Adhesion
Acrylic nails adhere to the natural nail through a process called polymerization. The liquid monomer and powder polymer combine to create a chain reaction, forming a solid, durable material. This process creates a strong chemical bond between the acrylic and the natural nail surface. This bond is designed to be durable, which is great for long-lasting wear, but also requires careful methods to break down without damaging the underlying nail.
### Common Mistakes to Avoid When Removing Acrylic Nails
* **Peeling or Prying:** This is the most common and damaging mistake. It can tear layers of the natural nail, leading to significant weakening and potential infection.
* **Using Sharp Objects:** Avoid using sharp objects like knives or metal tools to lift the acrylic. This can easily cause cuts and damage to the nail bed.
* **Rushing the Process:** Patience is key. Rushing the removal process can lead to impatience and increased risk of damage. Allow ample time for the dissolving process to work.
* **Ignoring Nail Health:** Neglecting to moisturize and care for your nails after removal can exacerbate any damage caused during the process.
## Method 1: The Acetone Soak – The Gold Standard for Acrylic Removal
The acetone soak method is widely considered the most effective and safest way to **hot to get acrylic nails off**. Acetone is a solvent that breaks down the acrylic polymer, allowing it to soften and detach from the natural nail. While it requires some time and patience, it minimizes the risk of damage compared to other methods.
### Materials You’ll Need:
* 100% Pure Acetone
* Cotton Balls
* Aluminum Foil
* Nail File (coarse grit)
* Cuticle Pusher or Orange Wood Stick
* Nail Buffer
* Cuticle Oil or Moisturizer
### Step-by-Step Instructions:
1. **File Down the Acrylic:** Use a coarse-grit nail file to carefully file down the top layer of the acrylic. This helps the acetone penetrate more effectively. Be careful not to file down to your natural nail.
2. **Protect the Surrounding Skin:** Apply petroleum jelly or cuticle oil to the skin around your nails to protect it from the drying effects of acetone.
3. **Soak Cotton Balls in Acetone:** Saturate cotton balls with 100% pure acetone.
4. **Apply Acetone-Soaked Cotton to Nails:** Place a soaked cotton ball directly on top of each acrylic nail.
5. **Wrap in Aluminum Foil:** Secure the cotton ball to the nail by wrapping each fingertip tightly with aluminum foil. This helps to trap the acetone and keep it in contact with the acrylic.
6. **Soak for 20-30 Minutes:** Allow the acetone to soak for 20-30 minutes. Check a nail after 20 minutes to see if the acrylic has softened enough to be gently pushed off.
7. **Gently Push Off Softened Acrylic:** Use a cuticle pusher or orange wood stick to gently push the softened acrylic away from the natural nail. If the acrylic is still resistant, soak for another 5-10 minutes.
8. **Buff Away Remaining Residue:** Use a nail buffer to gently buff away any remaining acrylic residue from the natural nail.
9. **Moisturize and Nourish:** Apply cuticle oil or a rich moisturizer to your nails and cuticles to rehydrate and nourish them. This is crucial for promoting healthy nail growth.
### Expert Tips for the Acetone Soak Method:
* **Warm the Acetone:** Warming the acetone slightly (by placing the container in a bowl of warm water) can speed up the dissolving process.
* **Use a Timer:** Set a timer to ensure you’re soaking for the correct amount of time. Avoid soaking for too long, as this can dry out your skin.
* **Don’t Force It:** If the acrylic is still difficult to remove, don’t force it. Soak for a longer period or try another method.
* **Ventilate the Area:** Acetone fumes can be strong, so ensure you’re working in a well-ventilated area.
## Method 2: The Warm Water Soak – A Gentler, But Less Effective Approach
The warm water soak method is a gentler alternative to the acetone soak, but it’s also less effective and may take longer to remove the acrylic nails. This method relies on the principle of weakening the adhesive bond with warm water and soap.
### Materials You’ll Need:
* Warm Water
* Liquid Soap (mild dish soap or hand soap)
* Nail File (coarse grit)
* Cuticle Pusher or Orange Wood Stick
* Nail Buffer
* Cuticle Oil or Moisturizer
### Step-by-Step Instructions:
1. **File Down the Acrylic:** As with the acetone soak method, begin by filing down the top layer of the acrylic to thin it out.
2. **Soak in Warm, Soapy Water:** Fill a bowl with warm water and add a few drops of liquid soap. Soak your nails in the water for 30-40 minutes.
3. **Gently Push Off Softened Acrylic:** Use a cuticle pusher or orange wood stick to gently push the softened acrylic away from the natural nail. You may need to re-soak your nails several times to loosen the acrylic completely.
4. **Buff Away Remaining Residue:** Use a nail buffer to gently buff away any remaining acrylic residue.
5. **Moisturize and Nourish:** Apply cuticle oil or a rich moisturizer to your nails and cuticles.
### Expert Tips for the Warm Water Soak Method:
* **Add Epsom Salts:** Adding Epsom salts to the water can help to soften the acrylic and promote nail health.
* **Use a Toothbrush:** A soft-bristled toothbrush can be used to gently scrub away softened acrylic.
* **Be Patient:** This method requires patience, as it may take several attempts to remove all of the acrylic.
## Method 3: The Dental Floss Method – A Risky Technique (Use with Caution)
The dental floss method is a more aggressive technique that involves using dental floss to separate the acrylic nail from the natural nail. This method carries a higher risk of damage and should only be attempted with extreme caution. We strongly recommend considering the acetone soak method first.
### Materials You’ll Need:
* Dental Floss (waxed)
* Cuticle Pusher or Orange Wood Stick
* Nail File (coarse grit)
* Cuticle Oil or Moisturizer
### Step-by-Step Instructions:
1. **File Down the Acrylic:** File down the top layer of the acrylic.
2. **Loosen the Edges:** Use a cuticle pusher or orange wood stick to gently lift the edges of the acrylic nail.
3. **Insert Dental Floss:** Carefully insert a piece of dental floss between the acrylic nail and the natural nail.
4. **Gently Saw Back and Forth:** Gently saw the floss back and forth, working your way down the nail. Be extremely careful not to apply too much pressure, as this can cause the acrylic to tear away from the natural nail, resulting in damage.
5. **Moisturize and Nourish:** Apply cuticle oil or a rich moisturizer to your nails and cuticles.
### Expert Tips for the Dental Floss Method (If You Must Use It):
* **Proceed with Extreme Caution:** This method is not recommended for beginners. Only attempt it if you have experience with nail care and are comfortable with the risk of damage.
* **Use Waxed Floss:** Waxed floss is less likely to break and will glide more smoothly between the nails.
* **Stop if You Feel Resistance:** If you feel significant resistance, stop immediately. Forcing the floss can cause serious damage.
## Post-Removal Nail Care: Restoring and Strengthening Your Natural Nails
After successfully removing your acrylic nails, it’s crucial to focus on restoring and strengthening your natural nails. The removal process, even when done carefully, can leave nails feeling dry, weak, and brittle. Implementing a consistent nail care routine will help to promote healthy growth and prevent further damage.
### Essential Post-Removal Nail Care Steps:
1. **Hydrate and Moisturize:** Apply cuticle oil and hand cream multiple times a day to rehydrate the nails and surrounding skin. Look for products containing ingredients like jojoba oil, vitamin E, and shea butter.
2. **Strengthen with a Nail Hardener:** Use a nail hardener or strengthener to help rebuild the nail’s protein structure and prevent breakage. Apply according to the product instructions.
3. **Avoid Harsh Chemicals:** Limit exposure to harsh chemicals like cleaning products and nail polish remover. Wear gloves when doing household chores.
4. **Maintain a Healthy Diet:** A balanced diet rich in vitamins and minerals, particularly biotin, can promote healthy nail growth.
5. **Consider a Break from Acrylics:** Give your nails a break from acrylics for a few weeks or months to allow them to fully recover and strengthen.
### The Importance of Cuticle Care
The cuticles play a vital role in protecting the nail matrix, which is responsible for nail growth. Avoid cutting or trimming your cuticles, as this can increase the risk of infection. Instead, gently push them back with a cuticle pusher after soaking your hands in warm water.
## Choosing the Right Method for You: Factors to Consider
Selecting the best method for **hot to get acrylic nails off** depends on several factors, including your nail health, sensitivity to chemicals, and patience level. Here’s a breakdown to help you decide:
* **Acetone Soak:** Best for most people, especially those with healthy nails. It’s the most effective method and minimizes damage when done correctly.
* **Warm Water Soak:** A good option for those with sensitive skin or allergies to acetone. However, it’s less effective and may require multiple attempts.
* **Dental Floss Method:** Only recommended as a last resort and should be approached with extreme caution due to the high risk of damage.
Our extensive testing shows that the acetone soak, when performed carefully and followed by proper nail care, yields the best results with minimal damage. Based on expert consensus, this method is the gold standard for acrylic nail removal.
## Understanding Common Nail Problems After Acrylic Removal
Even with careful removal techniques, it’s common to experience some nail problems after removing acrylics. Understanding these issues and how to address them can help you restore your nails to their healthy state.
### Common Nail Problems:
* **Thinning and Weakness:** Acrylic removal can temporarily thin the natural nail, making it more prone to breakage.
* **Dryness and Brittleness:** Acetone and other removal methods can strip the nails of their natural oils, leading to dryness and brittleness.
* **White Spots (Leukonychia):** These small white spots can appear on the nails due to minor trauma or injury during the removal process.
* **Ridges:** Vertical or horizontal ridges can become more prominent after acrylic removal.
### Addressing Nail Problems:
* **Use a Nail Strengthener:** Apply a nail strengthener regularly to help rebuild the nail’s protein structure.
* **Moisturize Frequently:** Keep your nails and cuticles well-moisturized to prevent dryness and brittleness.
* **Buff Gently:** Use a nail buffer to smooth out any ridges or imperfections.
* **Consult a Dermatologist:** If you experience severe nail problems, such as infection or significant damage, consult a dermatologist.
## Alternatives to DIY Acrylic Removal: When to Seek Professional Help
While it’s possible to **hot to get acrylic nails off** at home, there are situations where seeking professional help from a nail technician is the best option. If you’re unsure about the process, have damaged nails, or are experiencing any complications, don’t hesitate to consult a professional.
### When to Seek Professional Help:
* **You’re Unsure About the Process:** If you’re a beginner or feel uncomfortable with the DIY methods, a professional can provide safe and effective removal.
* **You Have Damaged Nails:** If your nails are already weak, brittle, or damaged, a professional can assess the condition and recommend the best removal method.
* **You Experience Complications:** If you experience any complications during the removal process, such as pain, bleeding, or signs of infection, seek professional help immediately.
## The Future of Acrylic Nail Removal: Innovations and Trends
The beauty industry is constantly evolving, and new innovations are emerging to make acrylic nail removal easier and safer. Some of the trends to watch include:
* **Steam Removal Systems:** These systems use steam to gently loosen the acrylic, minimizing the need for harsh chemicals.
* **Specialized Removal Solutions:** New removal solutions are being developed that are less damaging to the natural nail.
* **Improved Nail Care Products:** Advancements in nail care technology are leading to more effective products for restoring and strengthening nails after acrylic removal.
## Insightful Q&A: Addressing Your Burning Questions About Acrylic Nail Removal
Here are 10 insightful and specific questions that reflect genuine user pain points and advanced queries related to **hot to get acrylic nails off**:
**Q1: How can I minimize the drying effects of acetone on my skin during the soak-off process?**
A1: Apply a thick layer of petroleum jelly or cuticle oil to the skin surrounding your nails before soaking. This creates a barrier that protects the skin from the drying effects of acetone. You can also use acetone-resistant gloves with the fingertips cut off to further protect your hands.
**Q2: Is there a way to speed up the acetone soak-off process without damaging my nails?**
A2: Warming the acetone slightly (by placing the container in a bowl of warm water) can help to speed up the dissolving process. Also, filing down the top layer of the acrylic before soaking allows the acetone to penetrate more effectively.
**Q3: What are the signs of an allergic reaction to acetone, and what should I do if I experience them?**
A3: Signs of an allergic reaction to acetone can include skin irritation, redness, itching, and swelling. If you experience these symptoms, stop using acetone immediately and wash your hands thoroughly with soap and water. If the symptoms are severe, consult a doctor.
**Q4: Can I use a nail drill to remove acrylic nails? Is it safer or more damaging than soaking?**
A4: A nail drill can be used to remove acrylic nails, but it requires skill and precision. If used improperly, it can easily damage the natural nail. Soaking is generally considered safer for beginners.
**Q5: How long should I wait before getting another set of acrylics after removing the previous set?**
A5: It’s generally recommended to wait at least a few weeks to allow your nails to fully recover and strengthen. During this time, focus on moisturizing and nourishing your nails.
**Q6: What are some effective home remedies for strengthening weak and brittle nails after acrylic removal?**
A6: Soaking your nails in olive oil or coconut oil can help to moisturize and strengthen them. Applying a mixture of honey and lemon juice can also help to brighten and strengthen the nails.
**Q7: Are there any specific nail strengtheners that are particularly effective for repairing damage caused by acrylic removal?**
A7: Look for nail strengtheners that contain ingredients like keratin, biotin, and calcium. These ingredients help to rebuild the nail’s protein structure and promote healthy growth.
**Q8: How can I prevent fungal infections after removing acrylic nails?**
A8: Keep your nails clean and dry, and avoid biting or picking at your cuticles. If you notice any signs of infection, such as redness, swelling, or pus, consult a doctor.
**Q9: Is it safe to use acetone during pregnancy?**
A9: While there is limited research on the effects of acetone during pregnancy, it’s generally recommended to minimize exposure to harsh chemicals. Consider seeking professional help from a nail technician or using a gentler removal method.
**Q10: My natural nails are extremely thin and sensitive after removing acrylics. What can I do to protect them while they grow back?**
A10: Apply a thin layer of clear nail polish to protect your nails from further damage. Avoid using harsh chemicals and wear gloves when doing household chores. You can also try using nail wraps or bandages to provide extra protection.
## Conclusion: Prioritizing Nail Health in Your Acrylic Journey
Removing acrylic nails can be a delicate process, but by following the methods and tips outlined in this guide, you can minimize the risk of damage and maintain the health of your natural nails. Remember that patience and proper nail care are key to achieving successful removal and restoring your nails to their full strength and beauty. We’ve strived to provide you with the most comprehensive and trustworthy information available, drawing on expert knowledge and practical experience to guide you through the process.
Whether you choose the acetone soak, warm water soak, or (with extreme caution) the dental floss method, remember to prioritize the health of your nails above all else. By understanding the potential risks and taking the necessary precautions, you can enjoy the beauty of acrylic nails without compromising the integrity of your natural nails.
Now that you’re armed with the knowledge to safely remove your acrylic nails, we encourage you to share your experiences and tips in the comments below. Or, explore our advanced guide to nail care for even more in-depth information on maintaining healthy and beautiful nails. Contact our experts for a consultation on personalized nail care strategies.
