
How to Remove Silicone Caulk from Tub: The Ultimate Guide
Silicone caulk is a versatile sealant used in bathrooms to prevent water damage and mold growth. However, over time, it can become discolored, cracked, or simply unsightly. Removing old silicone caulk from your tub is a crucial step before applying a fresh bead. This comprehensive guide provides a step-by-step approach, expert tips, and essential tools to help you achieve a clean, professional result. Whether you’re a seasoned DIY enthusiast or a first-time homeowner, this article will equip you with the knowledge and confidence to tackle this common bathroom maintenance task effectively. We’ll cover everything from identifying the right tools and techniques to preventing future caulk failures, ensuring a long-lasting and watertight seal.
Understanding Silicone Caulk and Why Removal is Necessary
Silicone caulk is a synthetic polymer that creates a flexible, waterproof barrier. It’s widely used in bathrooms and kitchens to seal gaps around tubs, showers, sinks, and countertops. While durable, silicone caulk isn’t immune to wear and tear. Over time, it can degrade due to:
- Mold and Mildew Growth: Bathrooms are humid environments, making them ideal breeding grounds for mold and mildew. Silicone caulk, being porous, can harbor these microorganisms, leading to unsightly discoloration.
- Cracking and Shrinkage: Temperature fluctuations and constant exposure to water can cause silicone caulk to crack, shrink, and lose its elasticity. This compromises its ability to create a watertight seal.
- Discoloration: Even without mold growth, silicone caulk can become discolored due to mineral deposits from hard water or cleaning products.
- Adhesion Failure: Over time, the bond between the silicone caulk and the surrounding surfaces can weaken, leading to peeling and gaps.
Removing old, damaged silicone caulk is essential for several reasons:
- Prevents Water Damage: Cracked or peeling caulk allows water to seep behind surfaces, leading to costly water damage, including rot, mold growth, and structural problems.
- Improves Aesthetics: Fresh caulk enhances the look of your bathroom and gives it a clean, well-maintained appearance.
- Ensures a Watertight Seal: A new bead of caulk provides a reliable barrier against water intrusion, protecting your bathroom from moisture damage.
- Prepares for New Caulk: Removing old caulk ensures proper adhesion of the new caulk, creating a long-lasting and effective seal.
Tools and Materials You’ll Need to Remove Silicone Caulk from Tub
Before you begin, gather the necessary tools and materials. Having everything on hand will make the process smoother and more efficient.
- Utility Knife or Caulk Removal Tool: A sharp utility knife with a new blade is essential for cutting through the old caulk. A specialized caulk removal tool can also be helpful, especially for beginners.
- Caulk Softening Solution: A caulk softening solution, either commercially available or homemade (vinegar or rubbing alcohol), helps break down the silicone and makes it easier to remove.
- Putty Knife or Scraper: A stiff putty knife or scraper is used to pry up and remove the loosened caulk.
- Pliers or Needle-Nose Pliers: These tools can be helpful for gripping and pulling out stubborn pieces of caulk.
- Spray Bottle: For applying the caulk softening solution.
- Clean Cloths or Paper Towels: For cleaning up residue and drying surfaces.
- Rubbing Alcohol or Mineral Spirits: For removing any remaining silicone residue.
- Safety Glasses: To protect your eyes from flying debris.
- Gloves: To protect your hands from chemicals and sharp tools.
- Ventilation: Ensure proper ventilation in the bathroom.
Step-by-Step Guide: How to Remove Silicone Caulk from Tub
Step 1: Prepare the Area
Start by clearing the area around the tub. Remove any items that might get in the way or be damaged during the process. Protect the tub surface with a drop cloth or old towels to prevent scratches.
Step 2: Soften the Caulk
Apply a caulk softening solution to the old caulk. You can use a commercially available caulk remover or a homemade solution of vinegar or rubbing alcohol. Spray the solution liberally onto the caulk and let it sit for at least 15-30 minutes. This will help break down the silicone and make it easier to remove.
Expert Tip: For stubborn caulk, you can cover the area with plastic wrap after applying the softening solution to prevent it from evaporating too quickly.
Step 3: Cut the Caulk
Using a sharp utility knife or caulk removal tool, carefully cut along both edges of the caulk bead. Apply even pressure and try to avoid scratching the tub or surrounding surfaces. Make multiple passes if necessary to ensure a clean cut.
Safety First: Always cut away from yourself and keep your fingers clear of the blade.
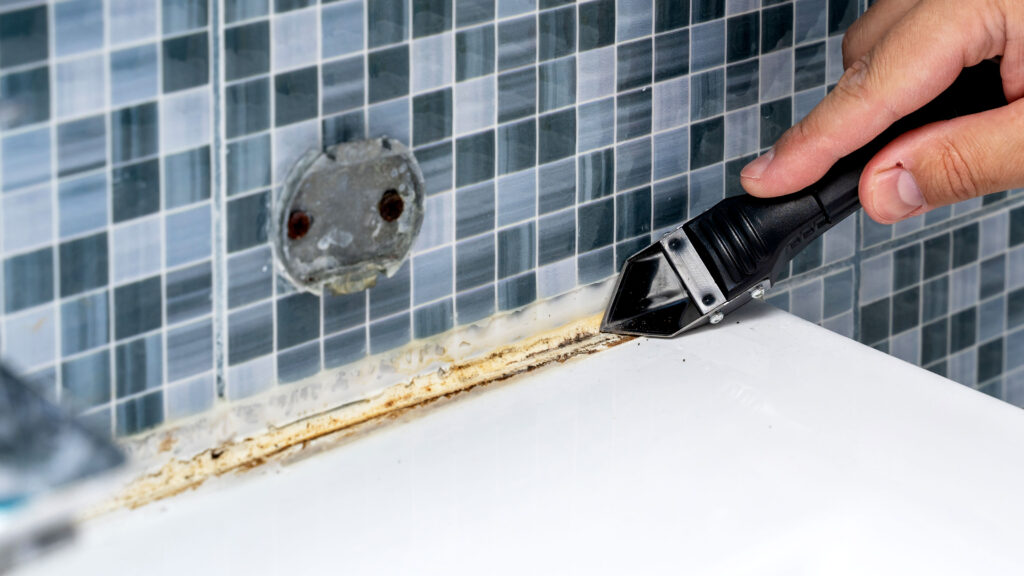
Step 4: Scrape Away the Caulk
Insert a putty knife or scraper under the cut edge of the caulk and gently pry it up. Work your way along the bead, loosening the caulk as you go. If the caulk is particularly stubborn, you may need to reapply the softening solution and let it sit for a few more minutes.
Pro Tip: Avoid using excessive force, as this can damage the tub or surrounding surfaces. Instead, use a gentle, steady pressure to loosen the caulk.
Step 5: Remove Remaining Residue
Once you’ve removed the bulk of the caulk, there will likely be some residue remaining. Use a clean cloth dampened with rubbing alcohol or mineral spirits to wipe away any remaining silicone. You may need to scrub gently to remove stubborn residue.
Step 6: Clean and Dry the Surface
Thoroughly clean the area with soap and water to remove any remaining dirt, grime, or cleaning solution. Rinse well and dry the surface completely before applying new caulk. A clean, dry surface is essential for proper adhesion of the new caulk.
Choosing the Right Silicone Caulk
Selecting the right type of silicone caulk is crucial for a long-lasting and effective seal. Consider the following factors:
- Type of Silicone: Choose a 100% silicone caulk specifically designed for bathroom use. These caulks are formulated to resist mold and mildew growth.
- Color: Select a color that matches your tub and surrounding surfaces. White is a common choice, but you can also find caulk in other colors, such as clear, almond, and gray.
- Cure Time: Consider the cure time of the caulk. Some caulks cure faster than others, allowing you to use the tub sooner.
Product Recommendation: GE Silicone II Kitchen & Bath Sealant is a popular and reliable choice for bathroom caulking. It’s 100% silicone, mold-resistant, and available in various colors.
Applying New Silicone Caulk: A Professional Finish
Applying new silicone caulk requires a steady hand and attention to detail. Follow these steps for a professional finish:
- Prepare the Caulk Gun: Load the caulk tube into the caulk gun. Cut the tip of the tube at a 45-degree angle, making sure the opening is the desired size for the bead of caulk.
- Apply the Caulk: Hold the caulk gun at a consistent angle and apply a smooth, even bead of caulk along the joint. Avoid applying too much caulk at once.
- Smooth the Caulk: Immediately after applying the caulk, smooth it with a wet finger or a caulk smoothing tool. This will create a clean, professional finish and ensure proper adhesion.
- Clean Up Excess Caulk: Use a damp cloth to wipe away any excess caulk from the surrounding surfaces.
- Allow to Cure: Allow the caulk to cure completely according to the manufacturer’s instructions before using the tub.
Preventing Future Caulk Problems
Taking preventative measures can help extend the life of your silicone caulk and prevent future problems:
- Proper Ventilation: Ensure proper ventilation in your bathroom to reduce humidity and prevent mold growth.
- Regular Cleaning: Clean the caulk regularly with a mild detergent and water to remove dirt and grime.
- Avoid Harsh Chemicals: Avoid using harsh chemicals or abrasive cleaners on the caulk, as they can damage the surface.
- Inspect Regularly: Inspect the caulk regularly for signs of damage, such as cracks, discoloration, or peeling. Replace the caulk as needed.
Advanced Techniques for Removing Stubborn Caulk
Sometimes, silicone caulk can be particularly stubborn and difficult to remove. Here are some advanced techniques that may help:
- Heat Gun: Use a heat gun to gently warm the caulk, making it more pliable and easier to remove. Be careful not to overheat the caulk or damage the surrounding surfaces.
- Specialized Caulk Removal Tools: Consider using specialized caulk removal tools, such as oscillating multi-tools with a scraper attachment. These tools can be very effective at removing stubborn caulk.
- Professional Help: If you’re struggling to remove the caulk yourself, consider hiring a professional contractor. They have the experience and tools to remove the caulk safely and efficiently.
Cost Considerations for DIY vs. Professional Removal
Deciding whether to remove the silicone caulk yourself or hire a professional depends on your skills, time, and budget. DIY removal can save you money on labor costs, but it requires time, effort, and the right tools. Professional removal can be more expensive, but it ensures a high-quality result and saves you the hassle of doing it yourself.
DIY Costs: The cost of DIY removal is typically low, ranging from $10 to $50 for tools and materials.
Professional Costs: Professional removal can cost anywhere from $50 to $200, depending on the size of the job and the contractor’s rates.
Considerations: If you’re comfortable with basic DIY tasks and have the time to spare, DIY removal can be a cost-effective option. However, if you’re not confident in your skills or prefer to avoid the hassle, hiring a professional is a worthwhile investment.
Silicone Caulk Removal for Different Tub Materials
The method for removing silicone caulk may vary slightly depending on the material of your tub. Here’s a brief overview:
- Acrylic Tubs: Acrylic tubs are prone to scratching, so use extra caution when removing caulk. Avoid using abrasive cleaners or harsh tools.
- Fiberglass Tubs: Fiberglass tubs are also susceptible to scratching, so use the same precautions as with acrylic tubs.
- Cast Iron Tubs: Cast iron tubs are more durable than acrylic or fiberglass tubs, but they can still be damaged by harsh chemicals or abrasive tools.
- Tile Tubs: When removing caulk from tile tubs, be careful not to damage the grout. Use a grout saw to carefully remove any caulk that is embedded in the grout lines.
Q&A: Expert Answers to Common Silicone Caulk Removal Questions
Q1: How long does it take to remove silicone caulk?
The time it takes to remove silicone caulk depends on the size of the area, the age of the caulk, and your skill level. It can take anywhere from 30 minutes to several hours.
Q2: Can I use a razor blade to remove silicone caulk?
While a razor blade can be effective for removing silicone caulk, it’s easy to scratch the tub or surrounding surfaces. Use a utility knife or caulk removal tool instead.
Q3: What’s the best way to soften old, hardened silicone caulk?
Apply a caulk softening solution, such as a commercially available caulk remover or a homemade solution of vinegar or rubbing alcohol, and let it sit for at least 15-30 minutes.
Q4: How do I prevent scratching the tub while removing caulk?
Use a sharp utility knife or caulk removal tool with a gentle, steady pressure. Avoid using excessive force or abrasive cleaners.
Q5: Can I reuse the same caulk gun for different types of caulk?
Yes, you can reuse the same caulk gun for different types of caulk. However, you should clean the gun thoroughly after each use to prevent clogs.
Q6: What’s the best way to clean up silicone residue?
Use a clean cloth dampened with rubbing alcohol or mineral spirits to wipe away any remaining silicone residue.
Q7: How long should I wait before using the tub after applying new caulk?
Allow the caulk to cure completely according to the manufacturer’s instructions before using the tub. This can take anywhere from 24 to 72 hours.
Q8: What are the signs that I need to replace the silicone caulk in my tub?
Signs that you need to replace the silicone caulk include cracks, discoloration, peeling, and mold growth.
Q9: Can I apply new caulk over old caulk?
No, you should always remove the old caulk before applying new caulk to ensure proper adhesion and a watertight seal.
Q10: What are some common mistakes to avoid when removing silicone caulk?
Common mistakes to avoid include using excessive force, scratching the tub, and not cleaning the surface properly before applying new caulk.
Conclusion: A Fresh Start for Your Tub
Removing old silicone caulk from your tub is a straightforward process that can significantly improve the look and functionality of your bathroom. By following the steps outlined in this guide, you can achieve a professional-quality result and ensure a long-lasting, watertight seal. Remember to take your time, use the right tools, and prioritize safety. With a little effort, you can transform your tub into a clean, inviting space.
Now that you know how to remove silicone caulk from tub, share your experiences or ask any further questions in the comments below. We’re here to help you achieve a perfect bathroom seal!
