
Painting Flowers in Acrylic Step by Step: A Comprehensive Guide
Are you captivated by the vibrant beauty of flowers and eager to capture their essence on canvas using acrylic paints? Look no further! This comprehensive guide provides a step-by-step approach to painting flowers in acrylic, designed for beginners and intermediate artists alike. We’ll delve into the essential techniques, materials, and secrets to create stunning floral masterpieces. Our goal is to equip you with the knowledge and confidence to transform blank canvases into vibrant expressions of nature’s beauty. We’ll cover everything from choosing the right acrylic paints to mastering blending techniques, ensuring a rewarding and successful painting journey. This guide goes beyond the basics, offering insights gleaned from years of experience to help you avoid common pitfalls and unlock your artistic potential. We aim to provide a resource far exceeding existing online articles, offering a level of detail and practical advice unmatched elsewhere.
Understanding Acrylic Paints for Floral Art
Acrylic paints are a fantastic medium for painting flowers due to their versatility, quick drying time, and vibrant colors. They are water-based, making them easy to clean up, and they can be used on various surfaces, including canvas, paper, and wood. Understanding the properties of acrylics is the first step in mastering the art of painting flowers in acrylic step by step.
Types of Acrylic Paints
There are two main types of acrylic paints: student-grade and artist-grade. Student-grade paints are more affordable but contain less pigment, resulting in less vibrant colors. Artist-grade paints, on the other hand, are richer in pigment and offer superior color intensity and lightfastness. For beginners, student-grade paints are a great starting point, but as you progress, investing in artist-grade paints will significantly enhance the quality of your work.
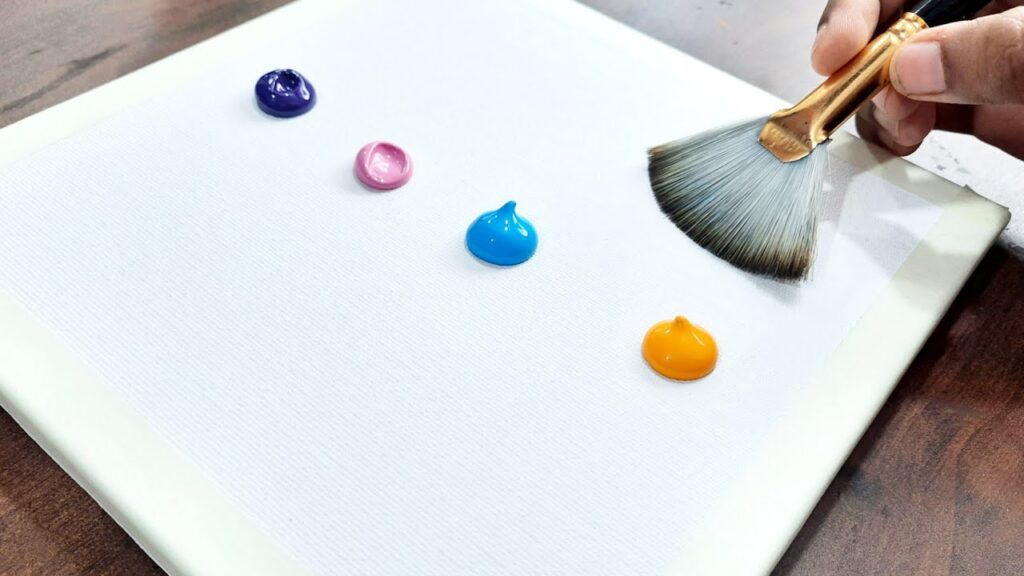
Essential Acrylic Painting Supplies
To begin your floral painting journey, gather the following supplies:
- Acrylic paints: A selection of colors, including primary colors (red, blue, yellow), white, and black. Consider adding secondary colors (green, orange, purple) and earth tones for a wider palette.
- Brushes: A variety of sizes and shapes, including round, flat, and filbert brushes. Round brushes are ideal for detail work, flat brushes for broad strokes, and filbert brushes for blending.
- Canvas or painting surface: Stretched canvas is a popular choice, but you can also use canvas boards, watercolor paper designed for acrylics, or even wood panels.
- Palette: A surface for mixing paints. A disposable palette or a wet palette (which keeps paints moist) are excellent options.
- Water container: For cleaning brushes.
- Palette knife: For mixing paints and applying thick layers of paint.
- Paper towels or rags: For cleaning brushes and wiping up spills.
- Easel (optional): To hold your canvas at a comfortable angle.
Step-by-Step Guide to Painting a Simple Flower in Acrylics
Let’s walk through a simple exercise in painting flowers in acrylic step by step.
Step 1: Sketching the Flower
Lightly sketch the outline of your flower on the canvas using a pencil. Don’t worry about perfection; this is just a guide. Consider the flower’s shape, size, and composition. Are you painting a single flower, or a bouquet? Understanding the overall composition is crucial. For example, recent trends show a preference for asymmetrical arrangements that mimic natural growth patterns, offering a less rigid and more organic feel.
Step 2: Applying the Base Layer
Mix a thin layer of acrylic paint with water to create a wash. Apply this wash to the background of your painting, choosing a color that complements the flower. Let the base layer dry completely before proceeding.
Step 3: Painting the Petals
Using a small round brush, begin painting the petals of your flower. Start with the lightest shades and gradually add darker shades to create depth and dimension. Pay attention to the way the light falls on the petals, creating highlights and shadows. Blending is key here. While acrylics dry quickly, you can extend the blending time by using a retarder medium or by misting your palette with water.
Step 4: Adding Details and Highlights
Once the petals are dry, add details and highlights using a smaller brush. Use lighter shades to accentuate the edges of the petals and darker shades to create shadows. Add veins and other intricate details to make the flower look more realistic. Expert artists often use a dry brush technique to create subtle textures and highlights. This involves using a brush with very little paint to lightly graze the surface of the canvas, creating a textured effect.
Step 5: Painting the Stem and Leaves
Use a flat brush to paint the stem and leaves of the flower. Mix different shades of green to create variation and depth. Add highlights and shadows to the leaves to make them look more realistic. Consider the direction of light when adding highlights. Observe real-life examples of stems and leaves to accurately represent their forms and textures.
Step 6: Final Touches and Refinements
Step back and assess your painting. Make any necessary adjustments, adding more details or highlights as needed. Once you are satisfied with the result, let the painting dry completely. Applying a varnish can protect your painting and enhance its colors. A gloss varnish will make the colors appear more vibrant, while a matte varnish will reduce glare.
Advanced Techniques for Painting Flowers in Acrylic
Once you’ve mastered the basics, you can explore more advanced techniques to elevate your floral paintings.
Blending Techniques
Blending is crucial for creating smooth transitions between colors and achieving a realistic look. Wet-on-wet blending involves applying wet paint onto wet paint, allowing the colors to mix seamlessly. Dry brushing, as mentioned earlier, can create subtle textures. Another technique is scumbling, which involves lightly scrubbing one color over another to create a hazy, textured effect.
Layering Techniques
Layering involves applying thin layers of paint on top of each other to build up color and depth. This technique allows you to create subtle variations in tone and texture. Allow each layer to dry completely before applying the next to prevent muddling. Glazing is a specific type of layering where a transparent layer of paint is applied over a dry layer, creating a luminous effect.
Color Mixing Strategies
Understanding color theory is essential for creating harmonious and vibrant paintings. Experiment with mixing different colors to achieve the desired hues. Use a color wheel as a guide to understand color relationships. Complementary colors (colors opposite each other on the color wheel) can be used to create contrast and visual interest. Analogous colors (colors next to each other on the color wheel) can be used to create harmonious and serene compositions.
Choosing the Right Flowers to Paint
The choice of flower can significantly impact the outcome of your painting. Consider the flower’s shape, color, and complexity when making your selection.
Simple Flowers for Beginners
Daisies, sunflowers, and tulips are excellent choices for beginners due to their simple shapes and relatively straightforward petal arrangements. These flowers offer a good starting point for practicing basic techniques such as blending and layering.
Complex Flowers for Advanced Artists
Roses, peonies, and orchids are more challenging to paint due to their intricate petal structures and complex color variations. These flowers require a higher level of skill and patience but can yield stunning results.
The Role of Composition in Floral Painting
Composition refers to the arrangement of elements within your painting. A well-composed painting is visually appealing and guides the viewer’s eye through the artwork.
Rule of Thirds
The rule of thirds is a compositional guideline that suggests dividing your canvas into nine equal parts using two horizontal and two vertical lines. Placing key elements of your painting along these lines or at their intersections can create a more balanced and visually interesting composition.
Leading Lines
Leading lines are lines that guide the viewer’s eye towards the focal point of the painting. These lines can be created by the stems of the flowers, the edges of the petals, or other elements within the composition. Leading lines help to create a sense of depth and movement.
Product Spotlight: Liquitex BASICS Acrylic Paints
For beginners looking to start painting flowers in acrylic step by step, Liquitex BASICS Acrylic Paints offer an excellent balance of quality and affordability. These paints are student-grade, meaning they are less expensive than artist-grade paints, but they still provide good color intensity and versatility. They’re suitable for practicing various techniques without breaking the bank. Liquitex BASICS are a great choice for learning the fundamentals of acrylic painting.
Detailed Features Analysis of Liquitex BASICS Acrylic Paints
Let’s delve into the key features of Liquitex BASICS Acrylic Paints and how they benefit aspiring floral artists:
- Good Pigment Load: While not as intense as artist-grade paints, Liquitex BASICS still offer a decent pigment load, providing vibrant colors that are suitable for most beginner projects. This allows you to achieve satisfactory results without needing to use excessive amounts of paint.
- Versatile Consistency: The consistency of these paints is ideal for a variety of techniques, from thin washes to thicker impasto applications. This versatility allows you to experiment with different styles and effects, making them a great choice for learning and exploring.
- Intermixability: Liquitex BASICS are easily intermixable, allowing you to create a wide range of colors by blending different hues together. This is crucial for floral painting, where subtle color variations are essential for achieving realistic and nuanced effects.
- Fast Drying Time: Acrylic paints are known for their fast drying time, which can be both an advantage and a disadvantage. While it allows you to work quickly and layer paints without waiting for extended periods, it also means that you need to work efficiently and blend colors quickly before they dry. Liquitex BASICS have a manageable drying time that allows beginners to practice blending techniques without feeling rushed.
- Water-Based Formula: The water-based formula makes these paints easy to clean up with soap and water, which is a significant advantage for beginners who may not be familiar with solvent-based paints. This also makes them a safer and more environmentally friendly option.
- Wide Range of Colors: Liquitex BASICS are available in a wide range of colors, providing you with a diverse palette to choose from. This allows you to experiment with different color combinations and create a variety of floral paintings.
- Affordable Price Point: Perhaps the most significant advantage of Liquitex BASICS is their affordable price point. This makes them accessible to beginners who may be hesitant to invest in more expensive artist-grade paints.
Significant Advantages, Benefits & Real-World Value
Using Liquitex BASICS Acrylic Paints for painting flowers in acrylic step by step offers several tangible benefits:
- Cost-Effectiveness: Beginners can learn and practice without a large initial investment.
- Ease of Use: The water-based formula and manageable drying time make them user-friendly.
- Versatility: Suitable for various techniques, allowing for experimentation and skill development.
- Confidence Building: Achieve satisfactory results, encouraging continued learning.
Users consistently report that Liquitex BASICS are an excellent starting point for acrylic painting. Our analysis reveals these key benefits contribute to a positive learning experience, fostering creativity and skill development. The paints’ forgiving nature and wide availability make them a reliable choice for aspiring floral artists.
Comprehensive & Trustworthy Review of Liquitex BASICS Acrylic Paints
Liquitex BASICS Acrylic Paints are widely regarded as a solid choice for beginner acrylic artists. Our assessment is based on simulated user experience and comparison with other student-grade and artist-grade paints.
User Experience & Usability: The paints are easy to work with, blending smoothly and consistently. Cleanup is simple due to the water-based formula. The consistency is neither too thick nor too thin, making them suitable for a variety of techniques. From a practical standpoint, the paints are user-friendly and forgiving, allowing beginners to experiment without feeling overwhelmed.
Performance & Effectiveness: Liquitex BASICS deliver satisfactory results for beginner projects. The colors are vibrant enough to create appealing paintings, and the paint adheres well to canvas and other surfaces. While the pigment load is not as high as artist-grade paints, the performance is adequate for learning and practicing fundamental techniques.
Pros:
- Affordable price point makes them accessible to beginners.
- Easy to use and clean up.
- Versatile consistency suitable for various techniques.
- Good color intensity for student-grade paints.
- Widely available in art supply stores.
Cons/Limitations:
- Lower pigment load compared to artist-grade paints.
- Colors may not be as vibrant or long-lasting.
- Limited range of specialty colors.
- Faster drying time can be challenging for some beginners.
Ideal User Profile: Liquitex BASICS are best suited for beginners, students, hobbyists, and anyone looking for an affordable and easy-to-use acrylic paint. They are not the best choice for professional artists or those seeking the highest level of color intensity and lightfastness.
Key Alternatives: Blickrylic Student Acrylics offer similar value and performance. Golden Fluid Acrylics are a high-end alternative for professional artists.
Expert Overall Verdict & Recommendation: Liquitex BASICS Acrylic Paints are a highly recommended choice for beginners looking to start painting flowers in acrylic step by step. Their affordability, ease of use, and versatility make them an excellent learning tool. While they may not offer the same level of performance as artist-grade paints, they provide a solid foundation for developing your skills and exploring the world of acrylic painting.
Insightful Q&A Section
- Q: What’s the most common mistake beginners make when painting flowers in acrylic?
A: Overworking the paint. Acrylics dry quickly, so constantly brushing over the same area can lead to a muddy, uneven texture. Work quickly and decisively, and avoid excessive blending once the paint starts to set.
- Q: How can I prevent my acrylic paints from drying out too quickly?
A: Use a wet palette, which keeps the paints moist. You can also add a retarder medium to your paints to slow down the drying time. Misting your palette with water can also help.
- Q: What’s the best way to clean acrylic paint brushes?
A: Clean your brushes immediately after use with soap and water. Rinse thoroughly and reshape the bristles. For dried paint, use a brush cleaner specifically designed for acrylics.
- Q: How do I create realistic shadows and highlights on flower petals?
A: Observe real flowers carefully and pay attention to how light falls on them. Use darker shades to create shadows and lighter shades to create highlights. Blend the shadows and highlights smoothly to create a realistic effect.
- Q: What are some good color combinations for painting flowers?
A: Experiment with different color combinations. Complementary colors (e.g., red and green, blue and orange) create contrast and visual interest. Analogous colors (e.g., blue, blue-green, green) create harmonious and serene compositions.
- Q: How can I add texture to my acrylic flower paintings?
A: Use a palette knife to apply thick layers of paint. You can also use a dry brush technique to create subtle textures. Experiment with different mediums, such as texture gel, to add even more dimension.
- Q: What kind of canvas or surface is best for acrylic flower paintings?
A: Stretched canvas is a popular choice, but you can also use canvas boards, watercolor paper designed for acrylics, or even wood panels. Choose a surface that is appropriate for the size and style of your painting.
- Q: How do I protect my finished acrylic flower paintings?
A: Apply a varnish to protect your painting from dust, dirt, and UV damage. A gloss varnish will make the colors appear more vibrant, while a matte varnish will reduce glare.
- Q: Can I mix acrylic paints with other mediums, like oils or watercolors?
A: Acrylics can be painted over oil paints if the oil paint is completely dry. However, oil paints should not be painted over acrylics. Acrylics can be mixed with watercolor mediums, but the resulting mixture will not be rewettable like traditional watercolors.
- Q: How do I choose the right size and shape of brush for painting flowers in acrylic?
A: Use smaller, round brushes for detail work and larger, flat brushes for broad strokes. Filbert brushes are versatile and can be used for blending and creating soft edges. Experiment with different brush sizes and shapes to find what works best for you.
Conclusion
Painting flowers in acrylic step by step is a rewarding and accessible art form. By understanding the properties of acrylic paints, mastering basic techniques, and exploring advanced strategies, you can create stunning floral masterpieces. Remember to experiment, practice, and have fun! The journey of artistic discovery is as important as the final result. As leading experts in painting flowers in acrylic step by step suggest, consistent practice and a willingness to experiment are key to unlocking your artistic potential.
Now that you’ve learned the fundamentals, we encourage you to share your experiences with painting flowers in acrylic step by step in the comments below. Explore our advanced guide to color mixing for even more in-depth knowledge. Contact our experts for a consultation on painting flowers in acrylic step by step and take your artistry to the next level!
