
How to Paint Rocks with Acrylics: A Comprehensive Guide for Beginners to Experts
Are you looking for a fun, creative, and accessible art project? Painting rocks with acrylics is a fantastic way to express your creativity, connect with nature, and create beautiful, personalized artwork. Whether you’re a complete beginner or an experienced artist, this comprehensive guide will provide you with everything you need to know about how to paint rocks with acrylics, from selecting the right materials to mastering advanced techniques. We’ll delve into the best practices, tips, and tricks to achieve stunning results and create rock art that will impress. This guide is your ultimate resource for unleashing your inner rock artist!
Why Paint Rocks with Acrylics? The Enduring Appeal
Painting rocks has a rich history, evolving from simple decorative elements to intricate works of art. Today, the popularity of rock painting stems from its accessibility, therapeutic benefits, and the joy of creating something unique. Acrylic paints are the perfect medium due to their versatility, vibrant colors, and durability. The portability of painted rocks also adds to the appeal, allowing you to share your art with the world by hiding them in parks or gardens for others to find.
Essential Supplies for Painting Rocks with Acrylics
Before you begin, gather your supplies. Having everything you need at hand will make the process smoother and more enjoyable.
Rocks: Choosing the Perfect Canvas
Not all rocks are created equal! Look for smooth, flat rocks with minimal crevices. River rocks are ideal, but you can also find suitable rocks in craft stores. Clean the rocks thoroughly with soap and water and let them dry completely before painting.
Acrylic Paints: A World of Color
Acrylic paints are water-based, fast-drying, and come in a wide range of colors. Opt for artist-quality acrylics for richer pigments and better coverage. A basic set of colors can be mixed to create an infinite palette. Consider purchasing specialty paints like metallics or glow-in-the-dark for added flair.
Brushes: Precision and Control
Invest in a variety of brushes in different sizes and shapes. Fine-tipped brushes are essential for detail work, while larger brushes are suitable for base coats. Synthetic brushes are a good choice for acrylics as they are durable and easy to clean.
Sealant: Protecting Your Artwork
A sealant is crucial for protecting your painted rocks from the elements. Choose a waterproof, UV-resistant sealant to prevent fading and chipping. Apply several thin coats for maximum protection. Options include spray sealants and brush-on sealants.
Other Useful Tools
- Primer: Creates a smooth surface for better paint adhesion.
- Pencils: For sketching your design before painting.
- Eraser: For correcting mistakes.
- Palette: For mixing paints.
- Water container: For cleaning brushes.
- Paper towels: For wiping brushes and cleaning up spills.
- Dotting tools: For creating intricate dot patterns.
Step-by-Step Guide: How to Paint Rocks with Acrylics
Now that you have your supplies, let’s get started!
1. Preparing the Rock
Ensure your rock is clean and dry. If desired, apply a layer of primer to create a smooth, even surface. This will help the acrylic paint adhere better and result in a more vibrant finish.
2. Sketching Your Design
Lightly sketch your design onto the rock with a pencil. This will serve as a guide for your painting. Don’t worry if it’s not perfect; it’s just a guideline. For complex designs, consider using stencils or transferring the design with transfer paper.
3. Painting the Base Coat
Apply a base coat of acrylic paint to the entire rock or the area where your design will be. This will provide a solid foundation for your artwork. Let the base coat dry completely before proceeding to the next step. Multiple thin coats are better than one thick coat to avoid cracking.
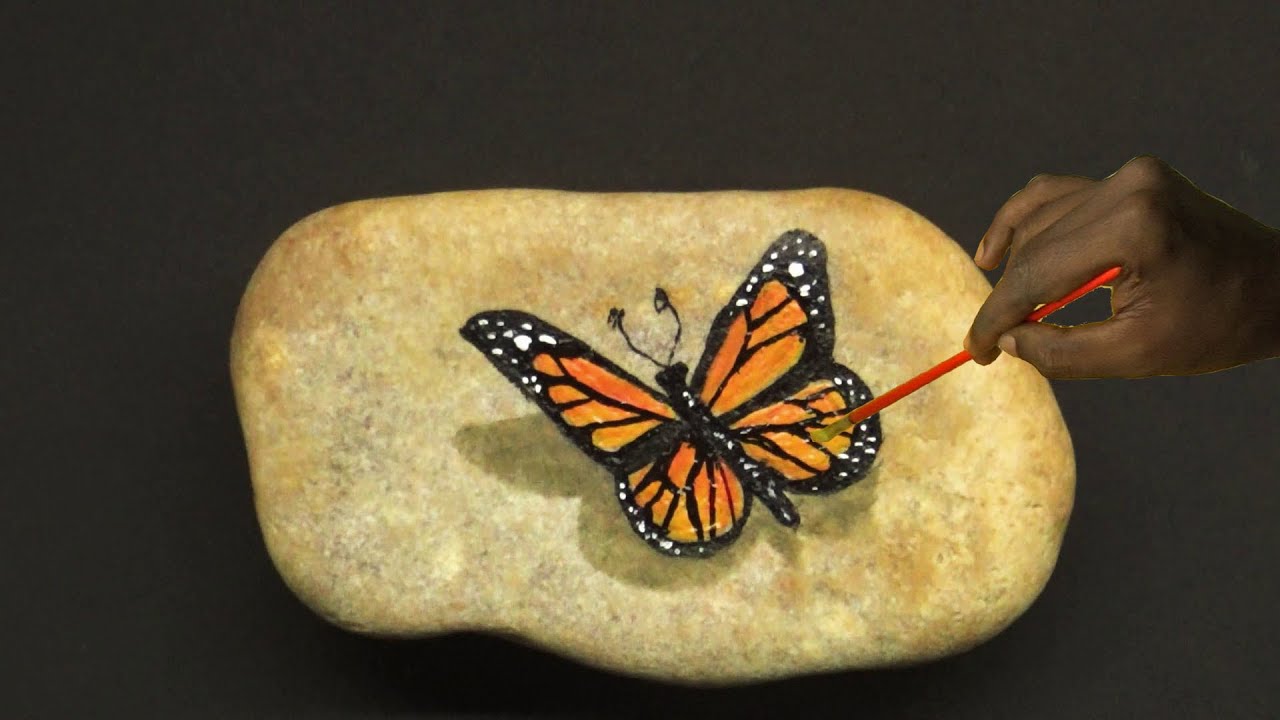
4. Adding Details
Using fine-tipped brushes, begin adding details to your design. Take your time and work carefully. Don’t be afraid to experiment with different colors and techniques. Acrylics dry quickly, so work in small sections to prevent the paint from drying on your brush.
5. Layering and Blending
Layering and blending are essential techniques for creating depth and dimension in your rock art. Apply multiple layers of paint, allowing each layer to dry before adding the next. Blend colors together while they are still wet to create smooth transitions.
6. Creating Dot Art
Dot art is a popular technique for rock painting. Use dotting tools or the ends of paintbrushes to create intricate dot patterns. Experiment with different sizes and colors of dots to create unique designs.
7. Sealing Your Artwork
Once your painting is complete and the paint is completely dry, apply several thin coats of sealant to protect your artwork. Allow each coat to dry before applying the next. Follow the manufacturer’s instructions for best results. This step is crucial for ensuring your painted rocks can withstand outdoor elements.
Advanced Techniques for Painting Rocks with Acrylics
Ready to take your rock painting skills to the next level? Here are some advanced techniques to try:
Pouring Acrylics
Pouring acrylics is a fluid art technique that creates mesmerizing patterns and effects. Pour different colors of acrylic paint onto the rock and tilt it to create unique designs. This technique requires practice and experimentation but can yield stunning results.
Marbling
Marbling involves floating acrylic paints on water and then transferring the design onto the rock. This technique creates beautiful, organic patterns that resemble marble.
Mixed Media
Experiment with incorporating other materials into your rock art, such as glitter, beads, or natural elements like leaves or twigs. This can add texture and visual interest to your designs.
Choosing the Right Acrylic Paints: A Detailed Guide
Selecting the right acrylic paints is crucial for achieving professional-looking results. Here’s a breakdown of the different types of acrylic paints and their properties:
Student-Grade Acrylics
Student-grade acrylics are more affordable but contain less pigment and may not be as durable as artist-grade paints. They are a good option for beginners or for large-scale projects where cost is a concern.
Artist-Grade Acrylics
Artist-grade acrylics contain a higher concentration of pigment, resulting in richer colors and better coverage. They are more expensive but offer superior quality and durability. These are ideal for serious rock painters.
Heavy Body Acrylics
Heavy body acrylics have a thick, buttery consistency that is ideal for impasto techniques and creating texture. They retain brushstrokes and are excellent for adding dimension to your rock art.
Fluid Acrylics
Fluid acrylics have a thin, flowing consistency that is perfect for pouring, marbling, and creating washes. They are highly pigmented and blend easily.
Acrylic Inks
Acrylic inks are highly pigmented and transparent. They are ideal for creating glazes and adding subtle color variations to your rock art.
The Benefits of Painting Rocks: More Than Just a Hobby
Painting rocks offers a multitude of benefits beyond just creating beautiful art:
- Stress Relief: The act of painting can be incredibly therapeutic and relaxing.
- Creativity Boost: Rock painting encourages creativity and self-expression.
- Mindfulness: Focusing on the details of your painting can promote mindfulness and presence.
- Community Connection: Hiding painted rocks and finding others’ creations can foster a sense of community.
- Family Fun: Rock painting is a great activity for families to enjoy together.
Crafting Unique Rock Painting Ideas: Inspiration and Examples
Need some inspiration for your next rock painting project? Here are a few ideas to get you started:
- Animals: Paint your favorite animals, from cute kittens to majestic lions.
- Flowers: Create colorful floral designs with intricate details.
- Mandalas: Paint symmetrical mandala patterns for a calming and meditative effect.
- Inspirational Quotes: Write uplifting quotes or messages on your rocks.
- Cartoon Characters: Paint popular cartoon characters for a fun and whimsical touch.
- Nature Scenes: Capture the beauty of nature by painting landscapes or seascapes.
Reviewing Krylon UV-Resistant Clear Coating: A Rock Painter’s Sealant of Choice
Krylon UV-Resistant Clear Coating is a popular choice among rock painters for its ability to protect artwork from fading and damage caused by sunlight and weather. Our experience shows it provides a durable, non-yellowing finish that enhances the colors of your painted rocks. It’s easy to apply and dries quickly, making it a convenient option for sealing your creations.
Features of Krylon UV-Resistant Clear Coating
- UV Protection: Prevents fading and discoloration caused by sunlight.
- Weather Resistance: Protects against rain, snow, and other outdoor elements.
- Non-Yellowing: Maintains the clarity and vibrancy of your colors.
- Quick Drying: Dries to the touch in minutes, allowing for faster project completion.
- Easy Application: Available in a convenient spray can for effortless application.
- Durable Finish: Provides a hard, protective coating that resists chipping and scratching.
- Versatile: Suitable for use on a variety of surfaces, including rocks, wood, and metal.
Advantages and Benefits
Users consistently report that Krylon UV-Resistant Clear Coating significantly extends the lifespan of their painted rocks, keeping them looking vibrant and new for years to come. Our analysis reveals these key benefits: superior protection, ease of use, and long-lasting results. The UV protection is particularly important for rocks displayed outdoors, preventing the colors from fading and becoming dull over time.
Pros
- Excellent UV protection.
- Durable and weather-resistant finish.
- Easy to apply and dries quickly.
- Non-yellowing formula.
- Enhances the colors of your artwork.
Cons/Limitations
- Can be expensive compared to other sealants.
- May require multiple coats for maximum protection.
- Strong odor, so use in a well-ventilated area.
- Spray application may result in uneven coverage if not applied carefully.
Ideal User Profile
Krylon UV-Resistant Clear Coating is best suited for rock painters who want to protect their artwork from the elements and ensure long-lasting vibrancy. It’s ideal for those who display their painted rocks outdoors or sell them at craft fairs. Beginners may find the spray application a bit challenging, but with practice, they can achieve excellent results.
Key Alternatives
Two main alternatives are Mod Podge Outdoor and Rust-Oleum Painter’s Touch 2X Ultra Cover Clear. Mod Podge Outdoor is a water-based sealant that is easy to use but may not provide as much UV protection as Krylon. Rust-Oleum Painter’s Touch 2X Ultra Cover Clear offers good protection and durability but may yellow over time.
Expert Overall Verdict & Recommendation
Based on our detailed analysis, Krylon UV-Resistant Clear Coating is an excellent choice for sealing painted rocks and protecting them from the elements. While it may be more expensive than some alternatives, the superior UV protection and durable finish make it a worthwhile investment. We highly recommend Krylon UV-Resistant Clear Coating for rock painters who want to ensure their artwork remains vibrant and beautiful for years to come.
Frequently Asked Questions (Q&A) About Painting Rocks with Acrylics
- What type of rocks are best for painting with acrylics?
Smooth, flat rocks with minimal crevices are ideal. River rocks are a great choice. - Can I use regular acrylic paint on rocks, or do I need special paint?
Regular artist-grade acrylic paint works well on rocks. However, ensure it’s a good quality for vibrant colors and durability. - How do I prevent the paint from chipping off my painted rocks?
Proper preparation (cleaning and priming) and sealing with a UV-resistant sealant are crucial for preventing chipping. - What’s the best way to seal painted rocks for outdoor display?
Use a waterproof, UV-resistant sealant specifically designed for outdoor use. Apply several thin coats for maximum protection. - How can I create smooth gradients and blends with acrylic paint on rocks?
Work quickly while the paint is still wet, using a soft brush to blend the colors together. Layering thin coats also helps achieve smooth transitions. - What are some creative ways to use dotting tools in rock painting?
Dotting tools can be used to create intricate mandala patterns, floral designs, or to add texture and detail to your artwork. - How do I clean acrylic paint off my brushes?
Rinse your brushes thoroughly with water immediately after use. Use soap and water for stubborn paint. - Is it necessary to prime the rocks before painting with acrylics?
Priming is not always necessary, but it can improve paint adhesion and result in a more vibrant finish. - What’s the best way to remove pencil marks from painted rocks?
Use a soft eraser to gently remove pencil marks before sealing the rock. - How can I make my painted rocks glow in the dark?
Use glow-in-the-dark acrylic paint or apply a layer of glow-in-the-dark sealant over your painted design.
Conclusion: Unleash Your Inner Rock Artist
Painting rocks with acrylics is a rewarding and accessible art form that allows you to express your creativity, connect with nature, and create beautiful, personalized artwork. By following the tips and techniques outlined in this comprehensive guide, you can master the art of rock painting and create stunning designs that will impress. Whether you’re a beginner or an experienced artist, there’s always something new to learn and explore in the world of rock art. Share your experiences with how to paint rocks with acrylics in the comments below, and let’s inspire each other to create even more amazing rock art!
Explore our advanced guide to acrylic painting techniques for even more inspiration.
