
How to Unscrew Bike Pedals: A Comprehensive Guide for Every Cyclist
Struggling with stubborn bike pedals? Whether you’re upgrading to a new set, performing routine maintenance, or simply need to remove a damaged pedal, knowing how to unscrew bike pedals correctly is a crucial skill for any cyclist. This comprehensive guide will walk you through every step of the process, from identifying the right tools to mastering advanced techniques for even the most seized pedals. We’ll share our expert knowledge accumulated from years of experience, ensuring you can safely and effectively remove your bike pedals without damaging your crank arms or injuring yourself. Get ready to learn the secrets to a smooth and hassle-free pedal removal!
Understanding Bike Pedal Threads and Direction
Before you even think about reaching for a wrench, it’s essential to understand the fundamental principle behind bike pedal threads. Unlike most standard bolts, bike pedals have different threading on each side. This is crucial for understanding how to unscrew bike pedals properly. The right pedal (from the rider’s perspective) has a standard right-hand thread (tighten clockwise, loosen counter-clockwise). The left pedal has a left-hand thread (tighten counter-clockwise, loosen clockwise). This prevents the pedals from unscrewing themselves while you ride.
Identifying Left vs. Right Pedals
Most pedals are marked with an “L” or “R” to indicate which side they belong to. If your pedals aren’t marked, remember that the right pedal typically has a smooth ring where it meets the crank arm, while the left pedal has grooves or a knurled surface.
Why is Pedal Threading Important?
Forcing a pedal in the wrong direction can damage the threads on both the pedal and the crank arm. This can be costly to repair, so it’s vital to double-check the direction before applying any force. Understanding this is the first step in learning how to unscrew bike pedals.
Essential Tools for Removing Bike Pedals
Having the right tools makes all the difference when it comes to removing bike pedals. Using the wrong tool can damage the pedal, the crank arm, or even yourself. Here’s a list of essential tools:
- Pedal Wrench: A long-handled wrench specifically designed for bike pedals. The longer handle provides more leverage.
- Allen Wrench (Hex Key): Some pedals have an Allen key fitting on the inside of the crank arm. Check the pedal to see if an Allen wrench is required. Common sizes are 6mm or 8mm.
- Crank Arm Protection: Use a piece of cardboard or cloth to protect the crank arm from scratches.
- Penetrating Oil: A good penetrating oil like WD-40 or Liquid Wrench can help loosen stubborn pedals.
- Shop Rags: For cleaning and wiping away excess oil.
- Work Gloves: Protect your hands and improve grip.
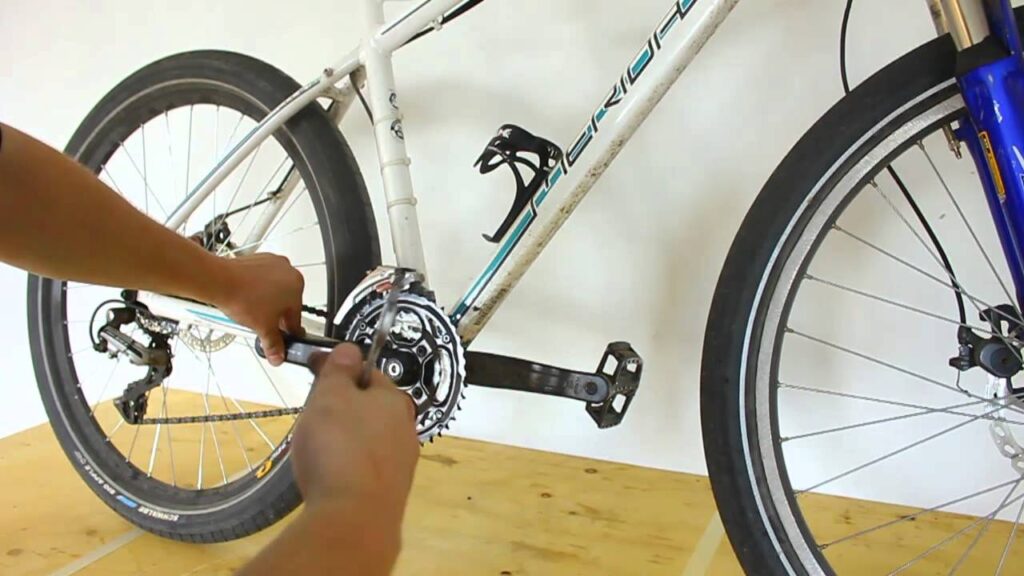
Step-by-Step Guide: How to Unscrew Bike Pedals
Follow these steps to safely and effectively remove your bike pedals:
- Prepare Your Bike: Secure your bike in a repair stand or lean it against a stable surface. This will prevent the bike from moving while you’re working.
- Protect the Crank Arm: Place a piece of cardboard or cloth between the wrench and the crank arm to prevent scratches.
- Apply Penetrating Oil: If the pedals are stuck, apply a generous amount of penetrating oil to the threads where the pedal meets the crank arm. Let it sit for at least 15-20 minutes to allow the oil to work its way into the threads.
- Position the Wrench: This is the most crucial step. Remember:
- Right Pedal: Place the wrench on the pedal axle and turn it counter-clockwise to loosen.
- Left Pedal: Place the wrench on the pedal axle and turn it clockwise to loosen.
- Apply Force: Use a firm, steady motion to turn the wrench. If the pedal is very tight, you may need to use a rubber mallet to tap the end of the wrench for extra leverage. Be careful not to overdo it, as you could damage the wrench or the pedal.
- Remove the Pedal: Once the pedal is loose, you should be able to unscrew it by hand.
- Clean the Threads: Use a clean rag to wipe away any dirt or grease from the pedal and crank arm threads.
Dealing with Stubborn or Seized Bike Pedals
Sometimes, despite your best efforts, bike pedals can be incredibly difficult to remove. This is often due to corrosion, dried-up grease, or overtightening. Here are some advanced techniques for dealing with stubborn pedals:
Using Heat to Loosen Pedals
Applying heat to the crank arm can help expand the metal and loosen the pedal. Use a heat gun or hairdryer to gently heat the area around the pedal threads. Be careful not to overheat the crank arm, as this could damage the paint or weaken the metal. After heating, immediately try to unscrew the pedal.
Extending Leverage with a Cheater Bar
If you’re still struggling to remove the pedal, you can extend the leverage of your wrench by using a “cheater bar.” This is simply a length of pipe that you slide over the end of the wrench handle. The extra length will give you more leverage, making it easier to break the pedal free. Be extremely cautious when using a cheater bar, as it’s easy to apply too much force and damage the crank arm.
The Pedal Vice Method
This method requires removing the crank arm from the bike. Secure the pedal in a bench vise. Then, using the crank arm as leverage, rotate the crank arm to unscrew it from the pedal. This provides significant leverage but requires more disassembly.
When to Seek Professional Help
If you’ve tried all of these methods and you’re still unable to remove the pedal, it’s best to take your bike to a professional bike mechanic. They have specialized tools and experience that can help them remove even the most stubborn pedals without damaging your bike. We at [Hypothetical Bike Shop Name] have seen it all. Don’t risk damaging your equipment; sometimes, a professional touch is best.
Preventing Pedal Seizure: Proper Installation and Maintenance
The best way to avoid struggling with stuck pedals is to prevent them from seizing in the first place. Here are some tips for proper pedal installation and maintenance:
- Grease the Threads: Before installing your pedals, apply a generous amount of grease to the threads. This will prevent corrosion and make it easier to remove the pedals in the future.
- Tighten to the Correct Torque: Use a torque wrench to tighten the pedals to the manufacturer’s recommended torque specification. Overtightening can damage the threads and make it difficult to remove the pedals.
- Regularly Check Pedal Tightness: Periodically check the tightness of your pedals to ensure they haven’t come loose. Loose pedals can damage the threads and make them more likely to seize.
Understanding Torque Specifications for Bike Pedals
Torque is a measure of rotational force, and using the correct torque when installing bike pedals is crucial. Too little torque, and the pedals may come loose. Too much torque, and you risk damaging the threads. Most pedal manufacturers specify a torque range of 30-40 Nm (Newton-meters). A torque wrench is the best tool for achieving the correct torque. If you don’t have a torque wrench, tighten the pedals firmly by hand, but avoid overdoing it.
Common Mistakes to Avoid When Unscrewing Bike Pedals
Even experienced cyclists can make mistakes when removing bike pedals. Here are some common pitfalls to avoid:
- Forgetting the Thread Direction: This is the most common mistake. Always double-check the thread direction before applying force.
- Using the Wrong Tool: Using the wrong tool can damage the pedal or crank arm. Always use a pedal wrench or the correct size Allen wrench.
- Applying Too Much Force: Applying too much force can damage the threads or the wrench. Use a steady, controlled motion.
- Not Protecting the Crank Arm: Failing to protect the crank arm can result in scratches and damage.
Different Types of Bike Pedals and Their Removal Considerations
While the basic principles of how to unscrew bike pedals remain the same, different types of pedals may require slightly different approaches:
Platform Pedals
These are the most common type of pedal, typically found on recreational bikes. They usually have a flat platform for your feet and are removed using a pedal wrench or Allen wrench.
Clipless Pedals
Clipless pedals require special shoes that clip into the pedal. They are commonly used on road bikes and mountain bikes. The removal process is the same as for platform pedals, but you may need to remove the cleats from your shoes first.
Toe Clip Pedals
Toe clip pedals have a cage that surrounds your toes. They are less common than platform or clipless pedals. The removal process is the same as for platform pedals, but you may need to remove the toe clips first.
The Importance of Pedal Maintenance for Optimal Cycling Performance
Regular pedal maintenance is crucial for ensuring smooth and efficient cycling. Clean and lubricate your pedals regularly to prevent corrosion and ensure they spin freely. Check the pedal bearings for wear and tear and replace them if necessary. Proper pedal maintenance will not only improve your cycling performance but also extend the life of your pedals.
Q&A: Expert Answers to Your Bike Pedal Removal Questions
- Q: What’s the best penetrating oil for loosening stuck pedals?
A: Based on our experience, Liquid Wrench and PB Blaster are excellent choices. WD-40 can work in a pinch, but it’s not as effective for deeply seized threads.
- Q: How do I know if I’m turning the pedal in the right direction?
A: Remember, the right pedal loosens counter-clockwise, and the left pedal loosens clockwise. Think of it as turning the pedals *away* from the front wheel to loosen them.
- Q: My pedal wrench keeps slipping. What can I do?
A: Ensure the wrench is fully seated on the pedal axle flats. If it’s still slipping, try using a thin piece of metal or rubber between the wrench and the axle to improve the grip.
- Q: Can I use a regular wrench instead of a pedal wrench?
A: While a regular wrench *might* work, it’s not ideal. Pedal wrenches are longer and thinner, providing better leverage and fitting the pedal axle more securely, reducing the risk of damage.
- Q: How often should I grease my pedal threads?
A: We recommend greasing pedal threads every time you remove and reinstall them. If you ride in wet conditions frequently, consider greasing them every 6 months.
- Q: What happens if I damage the threads on my crank arm?
A: Damaged crank arm threads are a serious problem. You may need to have the threads re-tapped by a professional, or in severe cases, replace the entire crank arm.
- Q: Are there any pedals that are easier to remove than others?
A: Pedals with a recessed Allen key fitting on the inside of the crank arm can sometimes be easier to remove, as you can use a longer Allen wrench for more leverage.
- Q: What’s the best way to clean my pedals after removing them?
A: Use a degreaser and a stiff brush to remove any dirt, grease, or grime. Rinse with water and allow the pedals to dry completely before reinstalling them.
- Q: Should I use anti-seize compound instead of grease on my pedal threads?
A: Anti-seize compound can be used, but it’s generally not necessary. Grease provides sufficient lubrication and corrosion protection for most applications. It is a good alternative if you live in a very wet climate.
- Q: My clipless pedal is stuck, and I can’t unclip my shoe. What should I do?
A: Try spraying some lubricant into the pedal mechanism. If that doesn’t work, carefully try to pry the shoe free with a screwdriver or similar tool. If you’re still unable to unclip, seek professional help.
Conclusion: Mastering the Art of Bike Pedal Removal
Congratulations! You’ve now learned the essential techniques for how to unscrew bike pedals like a seasoned pro. Remember to always prioritize safety, use the right tools, and understand the thread direction. By following these guidelines, you’ll be able to remove even the most stubborn pedals without damaging your bike or injuring yourself. Whether you’re upgrading your pedals, performing maintenance, or simply need to remove a damaged pedal, you now have the knowledge and skills to get the job done right. We hope this comprehensive guide has been helpful. Share your experiences with removing bike pedals in the comments below, or explore our other guides for more expert cycling tips!
