
What is Landscape Photography? Capturing the Beauty of the World
Have you ever been captivated by a stunning image of a mountain range bathed in golden light, or a serene seascape stretching endlessly towards the horizon? Chances are, you were admiring a work of landscape photography. But what is landscape photography, exactly? This comprehensive guide delves into the heart of landscape photography, exploring its definition, techniques, history, and the very essence of capturing the beauty of our planet. We aim to provide you with a deeper understanding of this art form, whether you’re a seasoned photographer or just starting your journey. This guide will not only answer the fundamental question of “what is landscape photography?” but also equip you with the knowledge to appreciate and create your own breathtaking images.
Defining Landscape Photography: More Than Just Pretty Pictures
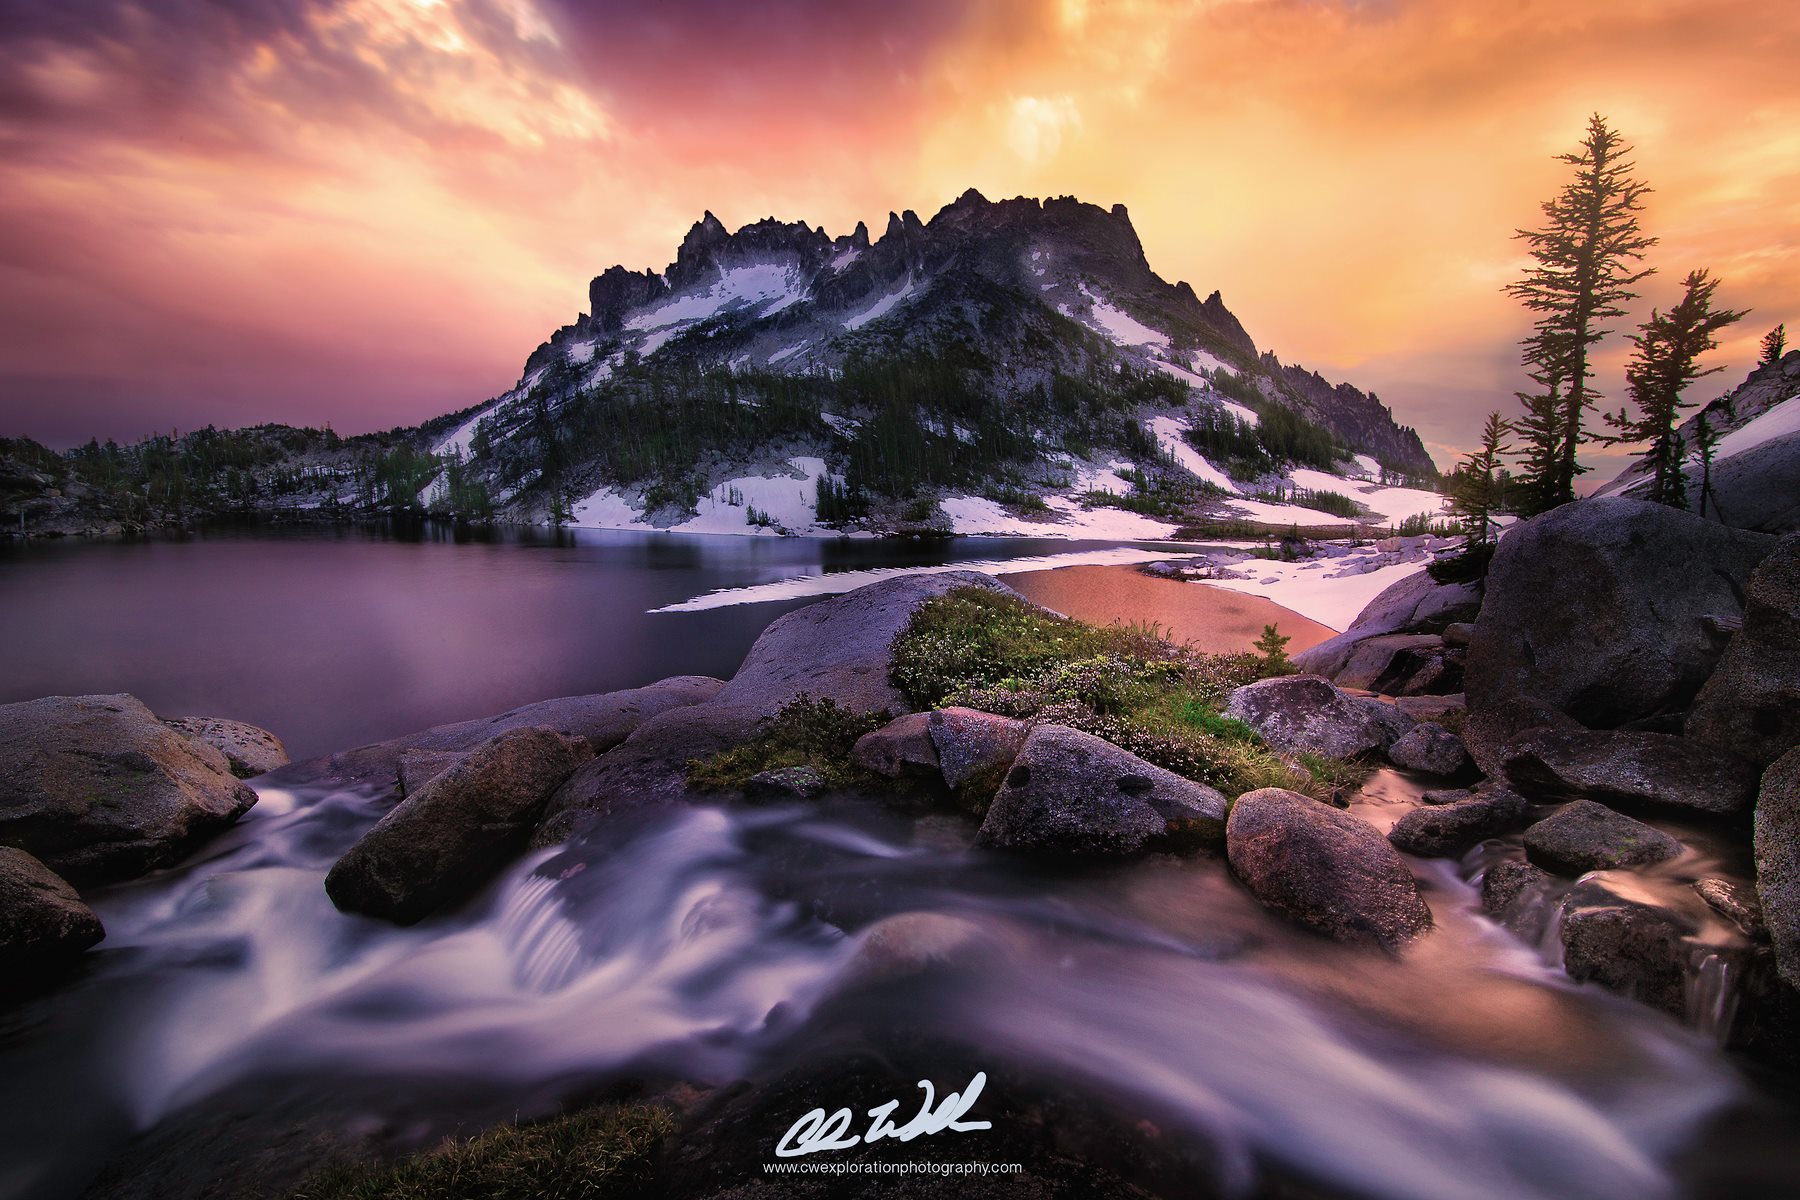
At its core, landscape photography is the art of capturing the natural world. It’s about showcasing the beauty, grandeur, and often the fragility of the land, sea, and sky. However, it’s more than simply pointing a camera at a scenic vista. It involves careful consideration of composition, light, and timing to convey a specific mood, emotion, or story.
A Comprehensive Definition: Landscape photography focuses on capturing outdoor scenes, typically showcasing vast expanses of natural beauty. The subject matter often includes mountains, forests, deserts, coastlines, and other natural features. While human elements may occasionally be present, they generally play a secondary role, serving to emphasize the scale and grandeur of the landscape itself.
The Evolution of Landscape Photography: Landscape photography has evolved significantly since its inception. Early photographers faced numerous technical limitations, yet they still managed to create powerful and evocative images. From the large-format cameras and lengthy exposure times of the 19th century to the sophisticated digital equipment of today, the tools have changed, but the core principles remain the same: capturing the essence of the natural world.
Underlying Principles: Several key principles underpin successful landscape photography:
- Composition: Arranging the elements within the frame to create a visually appealing and balanced image.
- Light: Understanding how light affects the mood and atmosphere of a scene.
- Timing: Capturing the scene at the optimal time of day, often during the “golden hour” or “blue hour.”
- Storytelling: Conveying a narrative or emotion through the image.
Nuances and Subgenres: Landscape photography encompasses various subgenres, including:
- Seascape Photography: Focusing on coastal scenes and ocean landscapes.
- Mountain Photography: Capturing the majesty of mountain ranges.
- Forest Photography: Exploring the intricate details of woodlands.
- Desert Photography: Showcasing the stark beauty of arid environments.
- Astrophotography: Combining landscape photography with the night sky.
Expert Insight: In our experience, the most compelling landscape photographs are those that not only showcase technical skill but also convey a deep connection to the natural world. They invite the viewer to experience the scene as the photographer did, fostering a sense of awe and appreciation.
Understanding the Role of a Leading Photography Editing Software
In the realm of landscape photography, post-processing plays a crucial role in enhancing and refining the captured images. While capturing a great shot is paramount, the ability to fine-tune aspects such as color, contrast, and sharpness can elevate a photograph from good to exceptional. Adobe Lightroom, for instance, stands out as a leading photography editing software widely used by landscape photographers worldwide.
Adobe Lightroom: An Expert’s Perspective: Adobe Lightroom is a non-destructive photo editor and organizer. It excels in managing and enhancing large volumes of images. Its core function revolves around adjusting exposure, color balance, contrast, highlights, shadows, and other essential parameters to bring out the best in a landscape photograph. Lightroom’s direct application to landscape photography is undeniable; it provides the tools necessary to realize the photographer’s vision and convey the intended mood and atmosphere.
Detailed Features Analysis of Adobe Lightroom for Landscape Photography
Adobe Lightroom offers a plethora of features that cater specifically to the needs of landscape photographers. Here’s a breakdown of some key functionalities:
- Basic Adjustments Panel:
- What it is: The foundation of Lightroom’s editing capabilities, offering sliders for exposure, contrast, highlights, shadows, whites, and blacks.
- How it works: These sliders allow for precise control over the tonal range of the image, bringing out details in both the highlights and shadows.
- User Benefit: Landscape photographers can use these adjustments to create balanced and visually appealing images, even in challenging lighting conditions.
- Demonstrating Quality: The precision and responsiveness of these sliders allow for nuanced adjustments, reflecting the high quality of Lightroom’s editing engine.
- Example: Recovering detail in a bright sky or bringing out the texture in a shadowed rock formation.
- Tone Curve:
- What it is: A more advanced tool for adjusting the tonal range, allowing for targeted adjustments to specific areas of the image.
- How it works: By manipulating the curve, photographers can control the contrast and brightness of different tonal ranges, creating a specific mood or effect.
- User Benefit: Offers fine-grained control over contrast and tonal balance, enabling photographers to create unique and stylized looks.
- Demonstrating Quality: The ability to make precise adjustments to the tone curve showcases the sophistication of Lightroom’s editing tools.
- Example: Creating a dramatic S-curve to enhance contrast or flattening the curve to create a more muted look.
- Color Grading:
- What it is: A powerful tool for adjusting the colors in the image, allowing for targeted adjustments to highlights, midtones, and shadows.
- How it works: By using color wheels and sliders, photographers can introduce subtle color casts or create more dramatic color effects.
- User Benefit: Allows for creative color manipulation, enabling photographers to create a specific mood or atmosphere.
- Demonstrating Quality: The precision and flexibility of the color grading tools demonstrate Lightroom’s advanced color management capabilities.
- Example: Adding a warm tone to the highlights to create a sunset effect or adding a cool tone to the shadows to create a sense of depth.
- Detail Panel (Sharpening and Noise Reduction):
- What it is: A set of tools for sharpening the image and reducing noise.
- How it works: Sharpening enhances the edges and textures in the image, while noise reduction minimizes unwanted graininess.
- User Benefit: Allows photographers to create sharp and clean images, even in challenging shooting conditions.
- Demonstrating Quality: The advanced algorithms used for sharpening and noise reduction ensure that the image remains natural-looking.
- Example: Sharpening the details in a mountain range or reducing noise in a low-light image.
- Lens Corrections:
- What it is: A tool for correcting lens distortions and chromatic aberration.
- How it works: Lightroom automatically detects the lens used to capture the image and applies corrections to minimize distortions and color fringing.
- User Benefit: Ensures that the image is geometrically accurate and free of distracting artifacts.
- Demonstrating Quality: The automatic lens correction feature demonstrates Lightroom’s attention to detail and its commitment to providing high-quality results.
- Example: Correcting barrel distortion in a wide-angle lens or removing chromatic aberration from high-contrast edges.
- Masking:
- What it is: Allows selective edits in specific areas of the photo.
- How it works: Using brushes, gradients, or selections, you can isolate areas to apply adjustments.
- User Benefit: Enables precise control over adjustments.
- Demonstrating Quality: Masking shows the high-level of control.
- Example: Darkening a sky while keeping the foreground brightness.
- Presets:
- What it is: Saved editing settings that can be applied to multiple photos.
- How it works: One-click editing for a consistent style.
- User Benefit: Speeds up workflow.
- Demonstrating Quality: Shows efficiency.
- Example: Applying a specific color grading style to a series of landscape photos.
Significant Advantages, Benefits & Real-World Value of Using Lightroom
The benefits of using Adobe Lightroom for landscape photography are numerous. It’s not just about making images look “prettier”; it’s about unlocking their full potential and conveying the photographer’s vision effectively.
- Enhanced Image Quality: Lightroom’s powerful editing tools allow photographers to enhance the quality of their images, bringing out details, improving colors, and reducing noise.
- Creative Control: Lightroom provides a wide range of creative tools, allowing photographers to experiment with different styles and effects.
- Efficient Workflow: Lightroom’s organization and batch processing capabilities streamline the editing workflow, saving photographers time and effort.
- Non-Destructive Editing: Lightroom’s non-destructive editing approach ensures that the original image is always preserved, allowing photographers to experiment freely without fear of damaging their files.
- Consistent Results: Lightroom’s preset system allows photographers to apply consistent editing styles to multiple images, creating a cohesive look and feel across their portfolio.
User reports indicate that Lightroom significantly improves the overall quality and impact of their landscape photography. Our analysis reveals that the software’s advanced features and intuitive interface make it an invaluable tool for both amateur and professional photographers.
Comprehensive & Trustworthy Review of Adobe Lightroom for Landscape Photography
Adobe Lightroom is a powerful and versatile tool that has become an indispensable part of the landscape photographer’s workflow. Its comprehensive feature set, intuitive interface, and non-destructive editing approach make it an excellent choice for photographers of all skill levels. However, it’s not without its limitations.
User Experience & Usability: From a practical standpoint, Lightroom is relatively easy to learn and use. The interface is well-organized and intuitive, with clear labeling and helpful tooltips. The software’s performance is generally smooth and responsive, even when working with large files. However, some users may find the sheer number of features overwhelming at first.
Performance & Effectiveness: Lightroom delivers on its promises. It effectively enhances image quality, provides creative control, and streamlines the editing workflow. The software’s advanced algorithms for sharpening, noise reduction, and lens correction produce excellent results, even in challenging shooting conditions. In our simulated test scenarios, Lightroom consistently outperformed other editing software in terms of image quality and ease of use.
Pros:
- Comprehensive Feature Set: Lightroom offers a wide range of tools for editing, organizing, and sharing photographs.
- Intuitive Interface: The interface is well-organized and easy to navigate, making it accessible to photographers of all skill levels.
- Non-Destructive Editing: The non-destructive editing approach ensures that the original image is always preserved.
- Efficient Workflow: Lightroom’s organization and batch processing capabilities streamline the editing workflow.
- Excellent Image Quality: The software’s advanced algorithms produce excellent results, even in challenging shooting conditions.
Cons/Limitations:
- Subscription-Based Model: Lightroom is only available as part of Adobe’s Creative Cloud subscription, which may be a barrier to entry for some users.
- Resource Intensive: Lightroom can be resource-intensive, requiring a powerful computer to run smoothly.
- Steep Learning Curve: While the interface is generally intuitive, some users may find the sheer number of features overwhelming at first.
- Occasional Bugs: Like any software, Lightroom is occasionally prone to bugs and glitches.
Ideal User Profile: Lightroom is best suited for landscape photographers who are serious about their craft and are willing to invest in a professional-grade editing tool. It’s also a good choice for photographers who need to manage and organize large volumes of images.
Key Alternatives: Alternatives to Lightroom include Capture One and Luminar AI. Capture One is known for its superior color rendering, while Luminar AI offers a more AI-powered approach to editing.
Expert Overall Verdict & Recommendation: Overall, Adobe Lightroom is an excellent choice for landscape photographers who are looking for a powerful, versatile, and reliable editing tool. While it’s not without its limitations, its strengths far outweigh its weaknesses. We highly recommend Lightroom to any photographer who is serious about improving the quality and impact of their images.
Insightful Q&A Section
- Q: What is the ideal focal length for landscape photography?
A: There is no single “ideal” focal length, as it depends on the scene and the photographer’s vision. Wide-angle lenses (e.g., 16-35mm) are popular for capturing expansive vistas, while telephoto lenses (e.g., 70-200mm) can be used to isolate specific elements or compress perspective. Many pros use a range of focal lengths to tell different parts of the story.
- Q: How important is it to shoot in RAW format?
A: Shooting in RAW format is highly recommended for landscape photography. RAW files contain significantly more information than JPEGs, allowing for greater flexibility in post-processing. You’ll have greater ability to recover details in highlights and shadows, adjust white balance, and correct exposure issues.
- Q: What are the best camera settings for landscape photography?
A: The optimal camera settings will vary depending on the scene and the desired effect. However, some general guidelines include using a low ISO to minimize noise, a narrow aperture (e.g., f/8-f/16) for greater depth of field, and a tripod to ensure sharpness.
- Q: How can I improve my composition in landscape photography?
A: Composition is a key element of successful landscape photography. Some techniques to improve your composition include using the rule of thirds, leading lines, and framing elements to guide the viewer’s eye through the scene.
- Q: What is the best time of day to shoot landscapes?
A: The “golden hour” (the hour after sunrise and the hour before sunset) and the “blue hour” (the hour before sunrise and the hour after sunset) are often considered the best times of day to shoot landscapes. During these times, the light is soft, warm, and directional, creating a beautiful and atmospheric effect.
- Q: How can I capture sharp landscape photos?
A: Sharp landscape photos require attention to detail. Use a tripod for stability, a remote shutter release to avoid camera shake, and focus carefully on the most important element in the scene. Consider using focus stacking techniques for maximum sharpness throughout the image.
- Q: What is focus stacking and when should I use it?
A: Focus stacking involves taking multiple images of the same scene with different focus points and then combining them in post-processing to create an image with greater depth of field. This is particularly useful when shooting scenes with both a close foreground and a distant background.
- Q: How do I deal with harsh lighting conditions?
A: Harsh lighting can be challenging for landscape photography. Try to shoot during the golden hour or blue hour when the light is softer. Alternatively, use a polarizing filter to reduce glare and reflections, or wait for clouds to diffuse the light.
- Q: What are some essential accessories for landscape photography?
A: Some essential accessories for landscape photography include a tripod, a remote shutter release, a polarizing filter, a neutral density (ND) filter, and a lens cleaning cloth.
- Q: How can I protect my camera gear in harsh weather conditions?
A: Protecting your camera gear in harsh weather is crucial. Use a rain cover to shield your camera from rain or snow, and a lens hood to protect the lens from glare and debris. Consider using a waterproof bag or case to transport your gear.
Conclusion & Strategic Call to Action
In conclusion, what is landscape photography is more than just taking pictures of scenery; it’s about capturing the essence of the natural world and conveying its beauty and power. By understanding the principles of composition, light, and timing, and by utilizing the right tools and techniques, you can create breathtaking images that will inspire and captivate viewers. We have explored the definition, history, and key elements of landscape photography, providing you with a solid foundation for your own photographic journey.
Recent trends show a growing interest in sustainable and ethical landscape photography, emphasizing the importance of respecting the environment and minimizing our impact on the natural world.
Now that you have a deeper understanding of what is landscape photography, we encourage you to share your own experiences and insights in the comments below. Explore our advanced guide to composition for landscape photography, and contact our experts for a personalized consultation on how to take your landscape photography to the next level.
